Thursday, October 16, 2014

French Silk Pie

French Silk Pie is very similar to chocolate pudding pie, except it has a lighter texture. The filling's texture is luscious, rich, and creamy. The flavor is sweet, chocolatey, and with a hint of vanilla. Serves  8-10 people
Ingredients:
1 Cup granulated sugar
3/4 Cup (12 tablespoons) unsalted butter, at room temperature
2 squares (3 ounces) unsweetened chocolate melted and cooled. I like using Ghirardelli chocolate the best.
1 1/2 teaspoons pure vanilla extract
pinch of table salt
2 large or extra large eggs
1 baked 9-inch pie crust
  1. In a large bowl, beat the sugar and butter with an electric mixer on medium speed, until light and fluffy, about 4 minutes. Beat in the chocolate, vanilla, and salt on medium speed until thoroughly combined.
  2. Add in the eggs, one at a time, beating on high speed after each addition and scraping sides of bowl constantly. Transfer to to the baked pie crust and cover the pie with plastic wrap. Chill 5-24 hours or until set. Top with whipped cream and milk chocolate shavings if desired.
From: The Better Homes and Gardens Cook Book


Friday, October 10, 2014

Fruit Oatmeal Bars

These bars are easy to make and the flavor is much better than anything you could buy at the store The texture is crunchy on the outside and somewhat chewy in the center. The flavor is sweet, buttery, with hints of cinnamon and vanilla, and there is a caramel flavor too. Makes about 18 small bars.
Ingredients:
3/4 Cup (1 1/2 sticks) unsalted butter cut into 6 pieces
2 teaspoons unsalted butter, softened for greasing foil
1 Cup firmly dried, cherries, raisins, or (packed) apricots.
1 1/2 Cups old-fashioned rolled oats. Don't use quick cooking oats.
1 Cup all-purpose flour
1 Cup firmly packed dark brown sugar. You can also use light brown sugar, but the flavor won't be as strong.
1/4 teaspoon salt
1/4-3/4 teaspoon ground cinnamon. Use at least the minimum and add in more if you want.
1 1/2 teaspoons pure vanilla extract
  1. Melt your butter in the microwave at 40% power for 30 seconds. Do this 2-3 times until the butter is melted. Make sure your butter doesn't explode. Preheat the oven to 350 degrees F. Line the bottom and sides of a 9-inch aluminum square pan. (Some foil hanging over the edges is fine.)  Lightly grease the foil with the softened butter. Using kitchen scissors, snip the apricots or cherries (not the raisins) into 1/2 inch pieces.
  2. In a medium bowl, combine the oats, flour, sugar, salt and cinnamon. Mix with a wooden spoon until well blended and no lumps of sugar remain.
  3. Add the fruit, melted butter, and vanilla to the oat mixture. Stir until well blended. The dough will be moist and crumbly. Dump the dough into the greased pan and press the dough into the pan with your fingers. 
  4. Bake until the top is golden brown, 35-45 minutes. Remove from the oven and set the pan on a wire rack, until completely cooled. Remove the foil, then cut up into 1 1/2-by-3-inch  rectangles. 


Thursday, October 2, 2014

Rice Pudding

Rice pudding is an easy dessert to make and it is delicious too. Though the ingredients are simple, the flavor is slightly sweet and very vanilla tasting. The texture is creamy and the rice makes it interesting in your mouth. Makes about six 1/2 servings.
Ingredients:
3 1/2 Cups milk. For best results use 1%, 2%, or whole milk. You can use skim milk, but it will burn more easily and won't be creamy.
1/2 Cup long-grain white rice
1/4 granulated sugar
1 1/2 teaspoons pure vanilla extract. I usually add another 1/2 teaspoon.
1/8 teaspoon table salt
  1. Put the milk and rice in a medium/large saucepan and set it over high heat. Bring it to a boil and reduce the heat to medium-low, stirring gently every 2 minutes. Simmer, stirring frequently with a wooden spoon, until the mixture is very thick with mostly the rice and hardly any milk is visible, 30-35 minutes. Remember to scrape down the sides of the pan regularly with the spoon.
  2. Toward the end of the cooking, stir more frequently to prevent the mixture from sticking or scorching.  Once the pudding is done cooking, remove the pan from the heat, stir in the sugar, vanilla, and salt, until the sugar is dissolved.
  3. Pour the pudding into a medium bowl. Put a large piece of plastic wrap over the bowl and press it directly onto the surface of the pudding.(to prevent a skin from forming.) Refrigerate until well chilled. You can also eat this warm.
Variations:
  • I like to stir in 1/2-2/3 cup of semi-sweet chocolate chips 5 minutes before taking the pan off the heat. 
  • You can also put some fresh berries on top before serving.
  • Sprinkle either cinnamon or ground nutmeg on top before serving.
  •  You can stir in raisins 10 minutes after the rice and milk have been cooking, so they will plump up and become somewhat "juicy".
From: William's-Sonoma The Kid's Cookbook


Thursday, September 25, 2014

Pastry Cream

Pastry cream is a delicious filling used in cream puffs éclairs. You can also use pastry cream to fill crêpes or you can simply eat it alone. This pastry cream is smooth with a pleasant vanilla flavor and a touch of sweetness. Makes about 2 cups.
Ingredients:
2 Cups half-and-half
1/2 cup (3 1/2 ounces) granulated sugar
1/2 vanilla bean, halved lengthwise, seeds removed and reserved. You can also use 1 1/2 teaspoons of pure vanilla extract just add it when you whisk in the butter.
5 large egg yolks
3 tablespoons cornstarch
4 Tablespoons (1/2 stick) unsalted butter, cut into 4 pieces
  1. Bring the half-and-half, 6 tablespoons of the sugar, vanilla bean and seeds, and salt to a simmer in a medium saucepan over medium-high heat, stirring occasionally.
  2. Meanwhile, in a separate bowl, whisk the egg yolks, cornstarch, and the remaining 2 tablespoons sugar together in a small bowl, whisk until smooth.
  3. Whisk about 1 cup of the simmering half-and-half mixture into the egg yolks to temper. Make sure you do it slowly at first and then increase the amount. Then slowly whisk the tempered egg yolks back into the simmering half-and-half mixture. Reduce the heat to medium and continue to cook, whisking constantly, until the pastry cream is thickened and a few bubbles burst on the surface, about 30 seconds.
  4. Turn off the heat, remove the vanilla bean and whisk in the butter. (If using vanilla extract add it in with the butter). Strain the pastry cream through a fine mesh strainer to remove any lumps, if desired. Immediately press plastic wrap directly on the surface. Refrigerate the pastry cream until cold and set, about 3 hours.
From: America's Test Kitchen Family Baking Book 

Thursday, September 18, 2014

Blueberry Muffins

Muffins are delicious and I think they taste better the day after. These taste buttery, with the sweet blueberry flavor, and a bit of citrus. These are also moist and a little spongy in texture. Makes about 12-18 muffins.
Ingredients:
3 Cups (15 ounces) all-purpose flour
1 Cup (7 ounces) granulated sugar
1 Tablespoon baking powder
1/2 teaspoon baking soda
1/2 teaspoon salt
1 1/2  whole or low-fat plain yogurt, at room temperature. You can also use sour cream instead, but using yogurt is better.
2 large eggs, at room temperature
1 teaspoon freshly grated lemon zest, about one large lemon
8 Tablespoons (1 stick) unsalted butter, melted and cooled
1 1/2 cups fresh or frozen blueberries
1 Tablespoon all-purpose flour

  1. Adjust an oven rack to the middle position and heat the oven to 375 degrees F. Grease a 12 -cup muffin tin with nonstick spray.
  2. Whisk the flour, sugar, baking powder, baking soda, and salt together in a large bowl. In medium bowl, whisk the yogurt, eggs, and lemon zest together until smooth. In a small bowl lightly toss the blueberries with 1 tablespoon of flour; set aside.Gently fold the yogurt mixture into the flour mixture with a rubber spatula, until just combined, then fold in the melted butter and blueberries. It is okay if there are lumps. Avoid over mixing, because that will cause your muffins to be tough.
  3.  Using a greased 1/3-cup measure, portion the batter into each muffin cup. Bake until golden brown and toothpick inserted into the center comes out with just a few crumbs attached, about 25-30 minutes, rotating the pan halfway through baking.
  4. Let the muffing cool in the pan for 5 minutes, then flip out onto a wire rack, and let cool for 10 minutes before serving. Store the leftovers in a Ziploc bag or an airtight container.
From; The America's Test Kitchen Family Baking Book

Thursday, September 11, 2014

Meatballs

Meatballs can be really tasty if they are made right.  However, most meatballs that I have eaten have been either tasteless or dry, but not these.  The flavor of these meatballs is amazing, and they are also moist and tender. These meatballs are garlicky, savory, a little woodsy tasting from the thyme, and have a little spiciness. I highly recommend using a kitchen scale to weigh out the meat mixture and rolling the weighed amounts into balls using your hands. You will get uniform looking meatballs this way, and even cooking throughout.  Makes about 30-33 meatballs.
Ingredients:
1 Cup unseasoned bread crumbs
3/4 Romano or Parmesan cheese, finely grated
1/2 Cup milk
1/2 Cup low-sodium beef broth
1/2 cup chopped fresh parsley
3 large eggs, beaten
2 Tablespoons dried oregano
1 Tablespoon garlic, minced
1 Tablespoon kosher salt, or 1/2 Tablespoon table salt
1 Tablespoon black pepper, ground
2 teaspoons dried basil
1 teaspoon crushed red pepper flakes
pinch of nutmeg

2 lb. ground chuck
1 Cup low-sodium beef broth to cover the bottom of your pan.
  1.  Preheat oven to 450 degrees F. and adjust an oven rack to the middle position. Coat a baking sheet or shallow roasting pan with nonstick spray.
  2. Combine the first 13 ingredients in a large bowl. Add the ground chuck and mix together thoroughly. Using either 2 spoons or a #30 portioning scoop, shape the meat mixture into balls (about 2'' in diameter or 1 1/2 ounces each). Place the meatballs on the prepared sheet or pan, and space the meatballs so they're not touching or crowded together.
  3. Cover the bottom of the pan with the cup of beef broth. Bake for 25 minutes, or until the meatballs are cooked through.
                                                     From: Cuisine at Home magazine

Friday, September 5, 2014

Marshmallow Crème

Homemade marshmallow crème is much tastier than store bought. The consistency however isn't near as light and fluffy, but the flavor and creaminess outweighs that. The flavor is sweet and very vanilla tasting, while the consistency is gooey and creamy. If you notice the flavor going away, refresh it by stirring in a 1/4-1/2 teaspoon of pure vanilla extract. You may find it hard to eat store bought marshmallow fluff after making this. Makes about 2 1/2 Cups.
Ingridents:
3/4 Cup granulated sugar
1/2 Cup light corn syrup
1/4 Cup water
2 large egg whites, at room temperture
1/4 teaspon cream of tarter
1/8 teaspoon table salt
1 1/2 teaspoons pure vanilla extract
  1. Stir together the sugar, corn syrup, and water in a small, heavy duty saucepan and cook on high heat. Bring to a boil, stirring occasionally, until the mixture reaches 240 degrees F on a candy/fat thermometer.
  2. Place the egg whites, cream of tarter, and salt in the bowl of a stand mixer fitted with the whisk attachment. (You can use an electric hand mixer, but it is harder to use with this recipe). Start whipping the egg whites to soft peak on medium speed. (The goal is to have the eggs whipped and ready waiting, for your syrup to be drizzled in. If they are whipping faster than your syrup is coming to temperature, just stop mixing until your syrup is ready.)
  3. When the syrup reaches 240 degrees F,  reduce the mixer to low and slowly drizzle in 2 tablespoons of the syrup into the egg whites to warm them. (Make sure that you don't drizzle in too much at once, because it will cause the egg whites to scramble.) Slowly drizzle in the rest of the syrup. Scrape down the bowl using a rubber spatula if needed before the next step. 
  4. Increase the speed to medium high and whip until the marshmallow crème is stiff and glossy, about 7 minutes. Add in the vanilla and whip 2 minutes more. Use immediately or store in an airtight container for up to 2 weeks.
From Chow.com


Thursday, August 28, 2014

Shortbread

Shortbread is a great and easy cookie to make if you are a beginner. Shortbread is sweet, rich, and buttery tasting and it practically melts in your mouth. Though the ingredients are simple, you will become addicted to this cookie. Serves 16.
Ingredients:
2 1/4 (11 1/4 ounces) Cups all-purpose flour
1/2 teaspoon salt
16 Tablespoons (2 sticks) unsalted butter, softened
1/2 Cup (2 ounces) confectioner's sugar
1/2 Tablespoon granulated sugar
  1. Whisk the flour and salt together in a medium bowl. In a large bowl, beat the butter and confectioner's sugar on medium speed until light and fluffy, 3-6 mintues, scraping down the bowl and beaters as needed. Reduce the mixer to low and slowly mix in the flour mixture until combined, about 30 seconds.
  2. Using your hands, press the dough into a ball in the bowl. Transfer the dough onto a lightly floured surface and knead until it is very smooth, about 2 minutes. Press the dough into a round disk, then place it on top of a piece of nonstick parchment paper (make sure it is large enough to fit on a baking sheet) and roll out into a 9-inch circle, about 1/2 inch thick.
  3. Transfer the dough and parchment paper to a baking sheet. Poke the dough with a fork and create a circular pattern all over the dough. Make sure that you don't poke all the way through. Using a sharp small knife, score the dough into 16 even wedges. Don't cut all the way through. Cover with plastic wrap and refrigerte the dough for 20 mintues.
  4. Adjust an oven rack to te middle position and heat the oven to 300 degrees F. Sprinkle the granulated sugar evenly over the dough. Bake the shortbread 40-45 minutes, roataing the pan halfway through baking. 
  5. Transfer the baking sheet to a wire rack and, using a sharp knife, cut through the scored marks to seperate the wedges. Let cool on the baking sheet for 10 minutes, then transfer to a wire rack and let cool compeltely for 1 hour.
From: The America's Test Kitchen Family Baking Book
Drizzle melted white, dark, or milk chocolate to add extra flavor after the shortbread is done cooling.


Thursday, August 21, 2014

Jalapeño Poppers

Jalapeño poppers are one of my favorite foods that I like to make during summer. They are easy to make and the flavor is amazing. The jalapeño's distinct flavor develops a slightly smoky flavor, while the cheese filling adds a creamy, and somewhat pungent flavor. Serves 6-8 people.
Ingredients:
1 (8 ounce) block of cream cheese, softened. You may need another block of cream cheese so buy one more just in case. You can use any kind of plain cream cheese except fat-free.
1 Cup cheddar cheese, shredded. I prefer using sharp cheddar cheese but mild or medium will work too. You may need another cup.
Salt and pepper to taste
1/2 teaspoon dried oregano, or 1 teaspoon finely chopped fresh oregano
14-18 fresh medium sized jalapeños. You can use other peppers that aren't very spicy such as mild banana peppers or something similar.

  1. Mix the cream cheese, cheddar cheese, salt, pepper, and oregano in a medium bowl; set aside. Cut the peppers in half length wise. Remove the seeds and white pith. You may want to use surgical gloves to avoid burning hands. Stuff the peppers with the cheese mixture using your hands or a small spoon. If there isn't enough of the cheese mixture make 1/4 of the recipe or half of a recipe more depending on how many peppers are left to stuff.
  2. Place the stuffed peppers on a grill pan. Preheat your grill to medium heat 10 minutes before grilling the peppers. Grill the peppers for about 10 minutes, or until the cheese mixture is melted and the peppers are slightly charred on the bottoms. Keep your grill lid closed during the grilling process. Be very careful removing the grill pan because it will be unbelievably hot. Use two, maybe even three hot-pad holders when you are bringing the grill pan inside. Just don't burn yourself or anyone else!
  3. Let the peppers cool down 5 minutes and carefully remove them with a small spatula. The pan will still be quite hot so be careful if you have any kids. 
Adapted from a Cooking Light recipe


Friday, August 15, 2014

Old Fashioned Chocolate Pudding

If you prefer the traditional dairy pudding this is the perfect recipe. It takes some time to make , but the payoff is worth it. This pudding is rich, creamy, and chocolaty. You can have a lot of fun adding in nuts, dried fruits, candies, or whatever else you think would be delicious. Try using different extracts such as almond, orange, or peppermint. Start with 1/4 teaspoon of your desired extract and taste as you go, increasing 1/4 teaspoon at a time until you have reached your desired taste. Just remember to use a 1/4 teaspoon of the vanilla and then add in the new extract. Serves 4-6 people.
Ingredients:
3/4 Cup granulated sugar
2 Tablespoons cornstarch or 1/4 cup all-purpose flour. I prefer using cornstarch.
1/3 Cup unsweetened cocoa powder
2 2/3 Cups milk. You can use any kind of dairy milk including skim. For the best results use whole or 2% milk.
4 large egg yolks beaten and make sure you use a bowl bigger than a cereal bowl; set aside.
1 Tablespoon butter
1 1/2 teaspoons pure vanilla extract
  1. In a heavy, medium saucepan combine sugar, cornstarch (or flour), and cocoa powder. Gradually whisk  in the milk and turn your stove top on medium heat. Cook and gently whisk until the mixture is thickened and bubbly; this could take 5-20 minutes. Remove from heat and gradually whisk in 1 Cup of the hot mixture into the beaten egg yolks.
  2. Return all of the egg mixture to the saucepan and bring the mixture to a gentle boil, whisking occasionally. Reduce the heat to medium-low and cook and whisk for 5 minutes more. Remove from heat and whisk in the butter and vanilla extract. Pour the pudding into a medium refrigerator safe bowl. Cover the surface immediately with clear plastic wrap and press down until the entire top is covered. Refrigerate 4-6 hours.
From: Better Homes and Gardens New Cookbook 1989 edition 

Thursday, July 31, 2014

Simple Drop Biscuits

These biscuits are great for beginners to make because they don't require any kneading!  Don't worry, you will still have fluffy biscuits as if you had kneaded your dough. These biscuits have a crunchy exterior with a moist and fluffy interior. The flavor is rich and buttery, a little sweet, with a slight tang. Everyone will love these simple yet delicious biscuits. Also, I'm going on vacation and I will not be posting anything new until August 14 or August 16+.  This recipe makes 12 biscuits.
Ingredients:
2 Cups (10 ounces) all-purpose flour
2 teaspoons baking powder
1/2 teaspoon baking soda
1 teaspoon granulated sugar
1/2 teaspoon table salt
1 Cup whole or low-fat buttermilk. Chill the buttermilk in the freezer for 15-18 minutes before using. Substitution: stir in white vinegar or lemon juice with the milk and let thick for 10 minutes before chilling it. The flavor won't be near as good if you don't use real buttermilk.
8 Tablespoons (1 stick) unsalted butter, melted and cooled slightly, plus extra for brushing
  1. Adjust an oven rack to the middle position and heat the oven to 475 degrees F. Line a baking sheet with parchment paper.
  2. Whisk the flour, baking powder, baking soda, sugar, and salt together in a large bowl. In a medium bowl, stir the chilled buttermilk and melted butter together until the butter forms small clumps. Stir the buttermilk mixture into the flour mixture with a rubber spatula until just incorporated and the dough pulls away from the sides of the bowl.
  3. Using a greased 1/4-cup measure, scoop out and drop mounds of dough onto the prepared baking sheet, spacing them about 1 1/2 inches apart. Bake until the tops are golden brown and crisp, 12-14 minutes, rotating the pan halfway through baking.
  4. Brush the baked biscuits with extra melted butter, transfer to a wire rack, and let cool for 5 minutes. Serve warm.
From: The America's Test Kitchen Family Baking Book


Thursday, July 24, 2014

Bruschetta

Bruschetta (properly pronounced bru-sketta) is an Italian appetizer. A really good friend of mine taught me how to make bruschetta and I thought that this is a great recipe to share for summer.  Bruschetta is a simple yet, flavorful dish that is wonderful.   Bruschetta combines a tomato's flavor with the sweet and pungent basil and a slight onion taste. Make sure your hands are really clean, because you will be touching the tomatoes a lot. I'm not sure how many this serves.
Ingredients:
1 pint of grape or cherry tomatoes. You can also use 5 medium/large Roma tomatoes. Scoop out the seeds and dice the tomato into small pieces.
1/2 teaspoon table salt
2/3-3/4 of a small yellow or white onion, diced finely
1 teaspoon white balsamic vinegar
1/3-1/2 cup (packed) sweet basil leaves, finely chopped
1 Tablespoon extra virgin olive oil
2 large garlic cloves, crushed slightly (optional). Crush a few minutes before serving.
Goat cheese, softened
Italian or French bread sliced at least 1/2 inch slices or more. Unless the width of your bread is small, you should cut each slice in half for the perfect bite-sized pieces.
  1. Cut each grape or cherry tomato with a serrated knife lengthwise and then slice each half into three pieces, cutting crosswise. Put the diced tomatoes in a colander and salt them. Evenly toss the salt and tomatoes with your hands. Let the tomatoes rest for 10 minutes. This draws out the water in the tomatoes and increases the tomatoes' flavor.
  2. After the 10 minutes have passed, firmly squeeze the tomatoes to remove even more water. Double line paper towels and place the squeezed tomatoes in the center. Wrap the paper towels up like a burrito and gently press the tomatoes in the "burrito".  
  3. In a medium bowl, add in all of the ingredients except the garlic, goat cheese, and bread. Gently mixed everything until well combined. Taste the mixture and see if you need more salt, olive oil, or white balsamic vinegar. Refrigerate this mixture in a shallow container 1-2 hours, or longer. Do not skip the refrigeration process. Keep the mixture in the refrigerate until ready to serve.
  4. Putting together the Bruschetta: Broil your bread in the oven for about 1 minute or until toasted. Lightly rub each toasted piece of bread with garlic, then apply a thin layer of goat cheese and put as much or as little of the tomato mixture on top. Serve immediately.


Friday, July 18, 2014

Peppermint Pattie Cake

I apologize for not posting yesterday. I didn't have time to finish writing this post and I am very sorry about it. This cake is very decadent and it can be a little overwhelming with its richness. The cake reminds me of a cross between a brownie and a soufflé. The cake is quite moist and dense (in a good way). The mint syrup balances out the richness but not too much. The ganache adds a smooth and creamy touch to this cake.  Make sure that you plan this cake ahead of time because it takes awhile to make, but is worth it.
For mint syrup: Make the night before
2 Cups packed fresh mint leaves
1 1/4 granulated sugar
3/4 water

  1. Rinse your mint leaves and set aside.  In a small saucepan, combine the sugar and water. Bring to a boil over medium heat, then lower the heat and simmer for 5-10 minutes until the sugar is completely dissolved. Remove from the heat and allow to cool completely.
  2. Fill a small bowl with ice and water and put it near the stove. Fill another saucepan about half-way with water and bring to a boil. Put the mint leaves in the water and blanch until they are just wilted, about 10 seconds. IMMEDIATLY strain the mint leaves and plunge the leaves in that bowl of ice water. This preserves the color. Strain the leaves one more time, then blot with a paper towel. 
  3. Using either a food processor, blender, or immersion blender, combine the mint leaves  and half of the syrup. Blend the mixture, stopping several times to scrape down the sides of your bowl. Add the remaining syrup and blend for 2 more minutes.
  4. Transfer the syrup to a clean storage container and allow to sit overnight at room temperature. Strain the mixture after 24 hours through a fine mesh strainer and discard the solid parts. You can store the syrup in the refrigerator for up to 2 weeks. Make sure to shake before using.
For the Ganache (make in the morning):
8 ounces semisweet or bittersweet chocolate, chopped finely. You can also use semisweet or bittersweet chocolate chip
1 Cup heavy cream or heavy whipping cream
  1. Heat the cream in a heavy-bottomed saucepan and bring to just under a boil. Add the chocolate, and let set for 5 minutes, then whisk until smooth. Remove from the heat and pour the mixture in a medium bowl and cool, stirring occasionally, until the mixture is thickened and spreadable. 
For the Cake:
14 ounces semisweet or bittersweet chocolate, coarsely chopped, or use the chip form
2 sticks (1 Cup) unsalted butter
1/4 Cup plus 2 Tablespoons heavy cream or heavy whipping cream
6 Large eggs, separated
1 Cup granulated sugar
1 Cup all-purpose flour
1/2 teaspoon kosher salt, or 1/4 teaspoon table salt
2 teaspoons pure vanilla extract
6 ounces small peppermint pattie candies, such as York or Pearson's Mint Patties. Dust a sharp knife with flour and cut each candy into fourths. Redust the blade as you go. Set aside. You can make this cake without the peppermint patties.
  1. Center an oven rack and preheat the oven to 350 degrees F. Line the bottom of a 9-inch spring-form pan and spray the pan with nonstick vegetable spray.
  2. In a medium heavy bottomed saucepan melt the butter with the cream on low heat. Stir in the chocolate and continue stirring until the mixture is smooth. Remove from the heat and set aside.
  3. Beat the egg yolks on medium-high speed using either an electric stand mixture (use the whisk attachment), or an electric hand mixture, gradually adding the sugar. Continue beating until the mixture is light yellow and very thick. Slow the mixer down and add the melted chocolate, and beat until just blended.
  4. Whisk the flour and salt together in a separate bowl; set aside. Replace the whisk attachment with the paddle or continue using the beaters. Add the flour to the egg mixture in thirds, beating after each addition until blended. Add the vanilla extract and beat until just blended. The mixture will be thick.
  5. In a clean mixing bowl, (using clean beaters), beat the egg whites until medium soft peaks form on medium speed. Fold about a third of the egg whites into the chocolate mixture. Fold the remaining egg whites into the chocolate mixture, and then fold the peppermint patties into the batter.
  6. Pour the batter into the spring-form pan and smooth the top. Put the pan in the middle of the oven for 45-50 minutes. When you insert a toothpick in the middle of the cake, it comes out moist and sticky, but not too wet.
  7. Cool the cake in the pan for 10 minutes. Remove the sides of the spring-form pan and cool the cake on a cake rack. When completely cooled, invert onto a serving plate and remove the parchment paper. Frost the cake with the ganache. When you are ready to serve the cake drizzle it with the mint syrup. Serve it with fudge sauce, whipped cream or ice cream if desired. 

/From: All Cakes Considered by Melissa Gray
//

Thursday, July 3, 2014

Baking Tips and Information

Baking is a lot of fun, but I find that it can be challenging. I've made a lot of mistakes (I still do) and you might have too, so I thought these tips may help you. I'm not going to post next week, because it's going to be an inconvenient time for me, but I will post on July 17. Best wishes to all.
  • Flour: There are several different kinds of wheat flour that are each produced for specific uses. 
  1. All-Purpose Flour: the most commonly used flour. Certain brands have a higher wheat protein which can be a good or bad thing. King Arthur's flour isn't the best for most desserts but can work great with yeast breads. When using all-purpose flour use either Gold Medal or Pillsbury.
  2. Cake Flour: contains a low wheat protein, thus producing a delicate crumb to cakes. I recently started using cake flour and now I will only use cake flour. Sadly, cake flour comes in small boxes and are more expensive than regular flour. However you can make your own. For 1 cup of cake flour use 3/4 cup all-purpose flour+2 tablespoons+ 2 tablespoons of cornstarch. Stir the mixture in a bowl, then sift 5 times. Don't skip the sifting process or the cake flour won't work. If a recipe tells you to avoid homemade cake flour containing cornstarch, please buy the real stuff.
  3. Bread Flour: bread flour has high wheat proteins that allows yeast breads to have a chewier texture. King Arthur's flour could make a decent substitute instead of bread flour. Personally, I haven't used bread flour but I would like to.
  • Eggs: Size matters in baking. Occasionally, cookbooks and baking books don't tell us what size to use. (Irritating isn't it?) Too much or too little liquid can be our enemy. My best bet is if a recipe doesn't include the egg size, use large eggs. Avoid small, medium, or jumbo sized eggs unless noted in your recipe. Always bring any liquids to room temperature.
  • Butter: Don't try to substitute butter for anything else, unless noted. The results will never be the same. 
  1. The perfect temperature for room temperature butter is about 65 degrees F. Room temperature butter should still be a little cold, easy to press, but not greasy. If you bend room temperature butter it should still be solid enough to not break. I'm not a huge fan of using the microwave for bringing butter to room temperature. Instead leave it on the counter top for about 45-60 minutes, or if you're in a hurry, cut the butter into 6 pieces and let sit for about 25-35 minutes.
  2. Use unsalted butter because salty desserts are not always wanted. 
  • Milk: I recommend using either 2%, 1%, or whole milk. Skim or fat-free milk can dry out cakes and other baked goods.  
  • Oils: The best oils to use are either canola, corn, or vegetable oil. Avoid using olive oil because it can have a strong flavor, unless noted.
  • How to measure your dry and liquid ingredients: 
  1. Liquid ingredients: Use a glass measuring cup or plastic cup. Not the kind that are sold in a set of 4.
  2. Dry ingredients: Use dry measuring cups that normally come in a 4-piece set. There are several ways to measure dry ingredients. Different methods can alter the outcome of your baked goods. A good baking book should tell you which method they like to use.
  3. The spoon-and-sweep method: putting spoonfuls of flour into the measuring cup and sweeping the excess flour off with the back of a table knife.
  4. The dip-and-sweep method: dipping the measuring cup into your dry ingredient, letting it overfill some, and sweeping the top off with the back of a table knife.
  5. The weigh method: Weighing your flour according to the recipe's amount. 
Why is this important? From what I have learned over the years, and you may know too, every cookbook prefers to use some methods over others. For example, a low-fat baking book would prefer the dip-and-scope method, because less flour is put into the measuring cup. An average baking book would use the dip- and-sweep. So which one method should be used? Preferably, an electric scale would be the best to use for weighing out your ingredients. You should get accurate measurements when using this method. However, quite a few baking books do not provide the exact measurements. When in doubt, use the dip-and-sweep method for average baking books, and spoon-and-sweep for low-fat baking books.


Friday, June 27, 2014

Chocolate Pudding Pie

This is one of my favorite chocolate pudding pies. The filling is smooth and creamy, no store bought pudding can compare. The flavor is extremely chocolaty with just a hint of vanilla. Serves 8-10. Also next week's post won't be a recipe, but instead a post about baking tips.
 For the original recipe:
https://www.hersheys.com/pure-recipes/details.aspx?id=8007&name=Velvety+Chocolate+Cream+Pie
Ingredients:
1 9-inch pie crust, bake and cooled, or 1 9-inch graham cracker crust, baked and cooled
3/4 Cup granulated sugar
1/3 Cup unsweetened cocoa powder
1/3 Cup cornstarch
1/4 teaspoon table salt
3 large eggs, beaten
3 Cups milk. You can use skim milk, but it won't be as creamy.
3/4 Cup dark or semisweet chocolate chips
3 tablespoons unsalted butter
2 teaspoons pure vanilla extract
  1. Make sure your pie crust is baked and cooled. 
  2. Stir together sugar, cocoa, cornstarch, and salt in a heavy-duty medium saucepan. Whisk the eggs and milk in a medium bowl, or 4-cup measuring cup, until combined. Gradually add the liquid mixture into the sugar mixture on medium heat. Whisk constantly, and cook the mixture until thickened and the mixture comes to a boil, 10-25 minutes. Remove from heat.
  3. Stir in the chocolate chips, butter, and vanilla extract until the pudding is smooth. Poor the pudding into the pie crust and immediately press plastic wrap onto the pie surface. Refrigerate 3-6 hours or until firm. Garnish with whipped cream and chocolate shavings if desired.

Thursday, June 19, 2014

Homemade Lemonade

With all of the hot weather (or at least where I am), I thought lemonade would be a great recipe to share. If you haven't tasted lemonade before it is a sweet, tart, and lemony drink. Lemonade is one of the best  refreshing drinks to sip throughout the hot weather. Serves five 8-ounce servings.
Ingredients:
4 to 5 medium or large lemons (about 1 cup), juiced
2/3 Cups granulated sugar
4 Cups water, preferably filtered
  1. In a large pitcher combine water, lemon juice, and sugar. Stir until sugar dissolves. Serve immediately over ice or chill until serving time. 
Variations:
  •  Strawberry lemonade: 6-8 Large strawberries sliced and put into 1 layer of cheese cloth; tie up. Add the strawberries to the pitcher of lemonade and let it sit for 4 hours in the refrigerator. Remove the strawberries, then serve garnishing with new freshly sliced strawberries, if desired.
  • Raspberry lemonade: Use 8-12 raspberries sliced in half, then follow the same instructions as the strawberry lemonade.
  • Arnold Palmer's: Mix 1 part unsweetened tea with 1 part lemonade.
  • Minty Lemonade: Chop up 10 or more large mint leaves and add to the lemonade. Let the lemonade and mint sit for 4 hours in the refrigerator. If you don't want the mint leaves in your tea, put the leaves in cheesecloth, tie it up and add it to the lemonade.
 Refreshing don't you think?
From: Better Homes and Gardens New Cookbook (1989)

Thursday, June 12, 2014

Peppermint Chocolate Cake

Marbled cakes look very attractive and adds a more elegant touch to either a bundt cake or tube cake. This cake is fun to make, but requires some time to prepare and bake. I would not recommend making this cake if you are in a rush. It is a very minty cake, with faint traces of the rum and chocolate flavors. The texture is slightly crunchy on the exterior, but moist and soft inside. Serves 16-32 depending on how you slice it.
Ingredients:
2 Cups granulated sugar
1/4 Cup unsweetened cocoa powder
1 Cup (2 sticks) unsalted butter, softened
4 Large eggs, at room temperature
3 1/2 Cups sifted cake flour
3 teaspoons baking powder
1/2 teaspoon table salt
1 Cup milk, at room temperature
2 teaspoons peppermint flavoring or extract
1/8 teaspoon green gel food coloring, or 1/2 teaspoon liquid food coloring
2 teaspoons rum, or rum extract
  1. Center an oven rack and preheat the oven to 350 degrees F. Grease either a 12-cup Bundt cake or 10-inch tube pan with nonstick vegetable spray. In a small bowl, combine 1/2 cup of the sugar and all of the cocoa; set aside. In a medium bowl, dry whisk the flour, baking powder, and salt; set aside.
  2. In a large bowl, cream the butter on medium speed, gradually adding the remaining amount 1 1/2 cups of sugar for about 3 minutes. Continue on medium speed adding each egg one at a time, beating well after each addition.
  3. On low speed, add 1 cup of the flour mixture, beat, then add 1/3 cup of milk and beat again. Repeat until all of the flour mixture and milk are blended into the batter. 
  4. Pour half of the batter into the flour mixture's bowl, and add the peppermint extract and food coloring. Stir until the green food coloring is completely incorporated.
  5. With the remaining batter, beat in the rum and cocoa&sugar mixture until combined, 1-2 minutes on medium speed.
  6. Pour 2/3 of the green batter into the bottom of the cake pan, then pour in all of the chocolate batter over the green batter. Layer the remaining green batter over the chocolate batter. Take a small spatula or plastic and cut through the middle of the batter ring to the bottom of the pan. Bring the spatula toward you and then up toward the side of the pan. Rotate the cake pan with your other pan and repeat. You'll do 2 rotations total, and no more.
  7. Bake 45-60 minutes, or until a toothpick inserted comes out clean. Let cool on a wire cake rack for 15-30 minutes in the pan, then unmold onto the cake rack and cool completely for 2 hours. Transfer to a serving plate.
From: All Cakes Considered by Melissa Gray

Thursday, June 5, 2014

Carrot Cake

Carrot Cake is such a classic, so I thought I would share my favorite recipe. Don't worry you won't taste the carrots, so give this cake a try. The texture is soft, and slightly spongy. The flavor is very pleasing, but is a little difficult to describe (or at least for me). This cake has a sweet taste and a wonderful aroma from the sweet/spicy cinnamon and cloves. Serves about 12-15.
Ingredients:
2 1/2 Cups (12 1/2 ounces) unbleached all-purpose flour
1 1/4 teaspoons baking powder
1 teaspoon baking soda
1 1/4 teaspoon ground cinnamon 
1/2 teaspoon freshly grated nutmeg, regular ground nutmeg
1/2 teaspoon table salt
1 pound ( about 6-7 medium) carrots, grated
1 1/2 Cups ( 10 1/2 ounces) granulated sugar
1/2 Cup packed (3 1/2 ounces) light brown sugar
4 Large eggs
1 1/2 Cups vegetable, safflower, or canola oil
For frosting:
8 ounces cream cheese, softened but still cool. Don't use fat-free cream cheese.
5 Tablespoons unsalted butter, softened but still cool
1 Tablespoon sour cream.
1/2 teaspoon pure vanilla extract
1 1/4 Cups (5 ounces) confectioner's sugar
  1. For The Cake: Adjust an oven rack to the middle position; heat the oven to 350 degrees F. Spray a 13 by 9-inch baking pan with nonstick cooking spray. Line the bottom of the pan with parchment paper and spray the parchment.
  2. Whisk together the flour, baking powder, baking soda, spices, and salt in a medium bowl; set aside.
  3. In a food processor fitted with the large shredding disk, shred the carrots. Add the carrots to the dry ingredients. Wipe out the food processor and fit with the metal blade. Process both the sugars and eggs until frothy and thoroughly combined, about 20 seconds. With the machine running, add the oil through the feed tube in a steady stream. Process until the mixture is light in color and well emulsified, about 20 seconds longer. Scrape the mixture into a large bowl. Stir in the carrots and dry ingredients until incorporated, and no streaks of flour remain.
  4. Pour into the prepared pan and bake until a toothpick inserted in the center comes out clean, 35-40 minutes. Cool the cake in the pan  on a wire rack for about 2 hours.
  5. For Frosting: When the cake is cool beat the cream cheese, butter, sour cream, and vanilla on medium-high speed until combined. On low speed, beat in the confectioner's sugar until combined. You can either keep the cake in the pan and frost it, or invert the cake onto a serving plate, remove the parchment, and then frost it.
From: Baking Illustrated

Thursday, May 29, 2014

Easy Greek Salad

 I love this Greek salad and it is so easy to make.This salad is light, refreshing and perfect for summertime parties. This salad has a variety of textures ranging from soft to crunchy. The flavor is mildly sour, lemony, and peppery. Serves about 4-6 people.
Ingredients:
24 small cherry or grape tomatoes.
3 ounces feta cheese, cut into 1/2 inch cubes. You can even use mozzarella balls if you prefer.
12 pitted kalamata olives
1/2 small red or sweet onion cut in to 1/2 inch pieces. If the onion is too sharp, rinse the cut pieces with water.
For dressing:
2 teaspoons fresh lemon juice
2 teaspoons red wine vinegar
2 teaspoons fresh oregano, or 1 1/2 teaspoons dried
2 Tablespoons extra-virgin olive oil
Table salt ,to taste
Freshly ground pepper, to taste

  1. In a small bowl whisk together the dressing; set aside. In a medium bowl or serving dish add all of the ingredients and toss carefully with the dressing. Serve immediately or keep in the refrigerator for up to 3 hours.

Recipe from: Giada De Laurentiis

Thursday, May 22, 2014

Oreo Cake

Oreo cookies are some of my favorite, and I thought I should make an Oreo cake. The cake is light, moist and has a somewhat velvet texture.  The cake's flavor tastes like an Oreo, but with a mild coffee flavor. The frosting tastes very similar to the Oreo creme, except it is fluffy. I highly recommended using black cocoa, for the cake will taste similar to an Oreo cookie. Serves about 12-14.
Ingredients:
1/2 Cup unsweetened cocoa powder. For a more Oreo like flavor, remove 2 Tablespoons of the unsweetened cocoa and replace it with 2 Tablespoons of black cocoa*.
1 Cup strong coffee, cooled
10 Tablespoons unsalted butter
1 1/2 cups granulated sugar
2 Large eggs, at room temperature
1 teaspoon pure vanilla extract
1 1/2 Cups cake flour
1 teaspoon baking soda
1/2 teaspoon table salt
1/2 teaspoon baking powder
For frosting:
24 Oreo cookies, scrape the filling out and set aside; reserve the cookies for decoration.
1/2 Cup of Confectioner's sugar
3/4 teaspoon pure vanilla extract
1 Cup heavy cream, chilled in the freezer for 5 minutes before using.
  1. Position a rack in the lower third of the oven and preheat to 350 degrees F. Grease two 9-inch cake pans and line the bottoms of the pans with nonstick parchment paper.
  2. In a small bowl, whisk the cocoa(s) and coffee until smooth; set aside. In a large bowl, mix on medium speed the butter, and gradually add in the sugar. Beat 3-6 minutes until light and fluffy. Add in the eggs one at a time, beating well after each addition. Add in the vanilla extract and mix for 15 seconds.
  3. In medium bowl, dry whisk the flour, baking soda, salt, and baking powder together. Add in half of the flour mixture to the butter mixture, beat, then add the coffee mixture and beat again, about 1 minute total. Scrape down as needed. Beat the remaining flour on low until smooth 30 seconds. Pour the cake batter into the prepared cake pans and bake 22-30 minutes until a toothpick inserted comes out clean.
  4. Cool the cakes in their pans for 10 minutes, then unmold onto wire baking racks. Let the cakes cool for 2 hours.
  5. For the frosting: Beat the chilled heavy cream on medium-high until soft peaks form. Gradually add in 1/2 Cup of the Confectioner's sugar until stiff peaks form. Beat in the Oreo filling and vanilla extract to the heavy cream mixture until smooth. Frost your cake and store it in the fridge until ready to serve. Keep leftovers in the fridge.
The cake recipe was based on a recipe from: All Cakes Considered by Melissa Gray
*Black cocoa is usually found online.


Thursday, May 15, 2014

Salty Oat Cookies

I used to not like oatmeal cookies until not that long ago, but now I do. The texture of these cookies are chewy, yet crunchy around the edges. The flavor is a buttery caramel, and of course a little salty. For the ones who aren't chocolate fans, you will find these to be tasty. Makes about 24 cookies.
Ingredients:
1 Cup (5 ounces) all-purpose flour
1/2 teaspoon baking soda
1/4 teaspoon table salt
16 Tablespoons (2 sticks) unsalted butter, softened
1 Cup (7 ounces) granulated sugar
1/4 Cup packed (1 3/4 ounces) light brown sugar
1 Large egg
1 teaspoon pure vanilla extract
3 1/2 Cups (10 1/2 ounces) old-fashioned rolled oats
1/2 teaspoon coarse sea salt ( Don't substitute with another kind of salt.)
  1. Adjust the oven racks to the upper-middle and lower-middle position and heat the oven to 375 degrees F. Line 2 large baking sheets with nonstick parchment paper. Whisk the flour, baking soda, and salt together in a medium bowl.
  2. In a large bowl, beat the butter and sugars together with an electric mixer on medium speed until light and fluffy, 3-6 minutes. Beat in the egg and vanilla until combined, about 30 seconds, scraping down the bowl as needed.
  3. Reduce the mixer speed to low and slowly add the flour mixture until combined, about 30 seconds. Mix in the oats until just incorporated.
  4. Working with 2 tablespoons of dough at a time, roll the dough into balls and lay them on the baking sheets, spaced about 2 inches apart. Flatten each cookie to a 3/4-inch thickness with your palm. Sprinkle a few grains of the coarse salt over the flattened tops of each cookie.
  5.  Bake the cookies until the edges are set and beginning to brown, but the centers are still soft and puffy, 15-17 minutes, switching and rotating the baking sheets halfway through baking.
  6. Let the cookies cool on the baking sheet for 10 minutes, then transfer to a wire rack to cool completely.
From: The America's Test Kitchen Family Baking Book

Thursday, May 8, 2014

Grilled Jerk Shrimp

The weather is becoming nicer (or at least where I live) and I thought this would be a great recipe to share.  Almost anything with the jerk spice is delicious to me. The flavor is a beautiful combination of spiciness (not too spicy though.), a touch of smokiness, and traces of the distinct allspice flavor (not sure how I would describe allspice in one word.), which makes jerk shrimp special. Serves about 4-6 people.
Ingredients:
1 Tablespoon granulated sugar
1 Tablespoon paprika
1/2 teaspoon table salt
1/2 teaspoon garlic powder
1/2 teaspoon ground Cayenne pepper
1/4 teaspoon ground dry thyme
1/8 teaspoon ground allspice
2 Tablespoon olive oil
1 1/2 pounds peeled, deveined large or medium shrimp
Other things: skewers, wood or metal. Make sure to soak the wood skewers for about half an hour or more.
  1. Heat your grill to medium-high heat. Combine the first 7 ingredients in a small bowl; whisk or stir. Combine the oil and shrimp together in a large bowl; toss well to coat. Sprinkle the spice mixture over the shrimp; toss to coat
  2. Thread the shrimp onto the skewers and set aside. Spray your grill with nonstick vegetable oil.  Place the skewers on the grill. Grill shrimp for 3 minutes then turn the skewers and grill for another 3 minutes.
From Cooking Light


Thursday, May 1, 2014

Coffee Chocolate Chip Cookies

Other than chocolate chip cookies these are my second favorite. Coffee lovers you are going to love these cookies. The coffee flavor is strong in these with little hints of the rum and vanilla flavors. The original recipe didn't have any chocolate chips in them, but I felt that a little chocolate was needed. Makes about 60 cookies.
Ingredients:
1 Cup (2 sticks) butter, softened
2 Tablespoons milk
2 Tablespoons instant coffee granules
2 Large or extra large eggs
1 teaspoon rum extract or pure vanilla extract
1/2 teaspoon pure vanilla extract
4 Cups all-purpose flour
1 teaspoon baking powder
1/2 teaspoon ground nutmeg
1/2-2/3 cup mini semisweet chocolate chips, depends on how much you would like. (optional)
  1. Beat butter and sugar in a large bowl with an electric mixer until well blended. Heat milk in a medium bowl in the microwave for 10-15 seconds on high. Add the coffee granules and stir until dissolved. Add the milk mixture along with the eggs, rum extract (or vanilla), and vanilla extract to the butter mixture. Beat at medium speed until well blended. 
  2. Combine flour, baking powder, nutmeg, and salt in a large bowl; stir to combine. Gradually add the flour mixture to butter mixture, beating at low speed after each addition until just combined; stir in the chocolate chips (if using).
  3. Shape dough into 2 logs, about 2 inches in diameter and 8 inches long. (Use a little bit of flour if needed). Wrap each log in plastic wrap; refrigerator overnight or freeze for about 2-4 hours, or until very firm.
  4. Preheat oven to 350 degrees F. Grease cookie sheets or line cookie sheets with nonstick parchment paper.
  5. Cut logs into 1/4-inch-thick slices; place 1-inch apart on cookie sheets. (Keep unbaked logs and sliced cookies chilled int the freezer or refrigerator, until ready to bake. Bake 8-12 minutes. (8-9 minutes for soft cookies, and 10-12 minutes for harder cookies.) Carefully transfer cookies to a wire rack to cool completely. You may need to let them cool on the cookie sheets for a minute or two.
From The Great American Cookie Cook Book


Thursday, April 24, 2014

Black Bean Burrito Bake

I am sorry for not to posting yesterday, for my week has been busy. Wednesdays seem to be the busiest for me, so I'm going to start posting on Thursdays. Anyway, this meal is very easy to make and takes about an hour or less to prepare. The flavor is spicy, smokey, and with just a hint of sourness. The texture is creamy but chunky. You could add some chopped cilantro on top and fresh lime juice to make this even better.
Serves 4
Ingredients:
1 (7-ounce) can chipotle chiles in adobe sauce
1/2 Cup sour cream, full fat or reduced.
1 (15-ounce) can black beans, rinsed, drained, and divided
1 Cup frozen whole-kernel corn, thawed
4 (8-inch) flour tortillas
1 Cup bottled salsa
1/2 Cup shredded Monterey Jack or cheddar cheese
  1. Preheat oven to 350 degrees F. 
  2. Remove 1 chile from can; finely chop the chile. (Reserve the remaining adobe sauce and chiles in an airtight container stored in the refrigerator for another use.) Combine sour cream and chopped chile in a medium bowl; let stand for 10 minutes.
  3. Place half of the beans in a food processor; process until finely chopped. You can also mash them with a fork or a pastry blender.  Add the chopped beans, remaining beans, and corn to the sour cream mixture and stir to combine.
  4. Spoon 1/2 Cup bean mixture down center of each tortilla. Roll up tortillas; place, seam sides down, in an 11 x7-inch baking dish coated with cooking spray. Spread salsa over tortillas; sprinkle with cheese. Cover with foil and bake for 20-25 minutes or until thoroughly heated.
From Cooking Light

Wednesday, April 16, 2014

Asian Garlic Pasta

This is one of my favorite pasta recipes. The flavor is a balanced combination of sweet, salty, buttery, and garlicky.  It's a great twist on pasta that you should try.  I would pair this with Asian fish or chicken, and a salad with ginger dressing. If you're like me, you can skip the meat and eat this by itself. Serves 4

Ingredients:
7 ounces (200 g) dry egg noodles. I used bow-tie pasta but you can use almost any other kind of pasta instead of egg noodles. Avoid tubular pastas like, macaroni, penne, sea shell, etc.
3 Tablespoons butter
1/2 Cup (30 g) chopped green onions (scallion)
3 cloves garlic, finely minced
2 Tablespoons light brown sugar
1 teaspoon Maggi sauce or soy sauce
1 Tablespoon oyster sauce, or soy sauce
  1. Bring a large pot of water to a boil and cook noodles according to the package instructions. Drain the noodles and coat them lightly with olive or vegetable oil.  Wipe out the pot and heat it to medium-high heat and add the butter.  When the butter is sizzling and bubbling add the green onions and garlic. Fry for 1 minute until very fragrant, be careful not to let the garlic burn.
  2. Add the brown sugar, Maggi sauce, and oyster sauce and stir well to mix everything evenly.  Add the noddles and toss vigorously to coat evenly.  Serve immediately.
From The Steamy Kitchen Cookbook by Jaden Hair

Wednesday, April 9, 2014

Chocolate Tofu Pudding

I know tofu pudding may sound gross to some people, but this one is great tasting and easy to make. The texture almost has more of a chocolate mousse texture than a pudding texture. The flavor is chocolaty with just a hint of the coffee flavor. Just so you know, the alcohol doesn't cook off completely. Serves about 8 people.
Alton Brown's original recipe:
http://www.foodnetwork.com/recipes/alton-brown/moo-less-chocolate-pie-recipe.html
Ingredients:
13 ounces semisweet chocolate chips, or dark chocolate chips if you like.
1/3 Cup coffee liqueur
1 teaspoon pure vanilla extract
1 pound silken tofu, you can't use any other kind of tofu texture. I used the lite silken tofu and that works too.
1 Tablespoon honey
1/8 teaspoon table salt
  1. Melt the chocolate, coffee liqueur, and vanilla extract in a medium sized heavy duty sauce pan over low heat stirring occasionally, until the chocolate is completely melted. Be careful that the chocolate doesn't burn! Check out Alton Brown's method of melting the chocolate if you don't like mine. Once everything is melted, set aside the chocolate mixture in a small bowl.
  2. Combine the tofu and honey in either a blender or food processor, and spin until smooth, about 1 minute. Add in the chocolate mixture and spin until combined. Pour mixture into your container(s) and refrigerate for about 2 hours.


Wednesday, April 2, 2014

Oatmeal Fudge Bars

These decadent bars are full of pleasing textures and flavors. The crust tastes similar to a buttery caramel and the topping is buttery tasting with a slightly nutty flavor. The topping is chewy while the filling has a smooth under-baked brownie consistency. The filling is unbelievably rich and chocolaty, which will make you want more. Makes 16 bars.
Crust and Topping:
1 Cup (3 ounces) quick-cooking oats
1 Cup packed (7 ounces) light brown sugar
3/4 Cup (3 3/4 ounces) all-purpose flour
1/4 teaspoon baking powder
1/4 teaspoon baking soda
1/8 teaspoon table salt, about a pinch
8 Tablespoons (1 stick) unsalted butter, melted and cooled
Filling:
1/4 Cup (1 1 1/4 ounces) all-purpose flour
1 Cup packed brown sugar (1 3/4 ounces) light brown sugar
2 teaspoons instant espresso or instant coffee
1/4 teaspoon table salt
1 1/2 Cups (9 ounces) semisweet chocolate chips
2 Tablespoons unsalted butter
1 Large egg
  1. Adjust an oven rack to the middle position and heat to 325 degrees F. Line an 8-inch square metal baking pan with two layers of aluminum foil, overlapping each other; lightly spray with nonstick vegetable oil.
  2. For crust and topping: Whisk the oats, flour, baking powder, baking soda, and salt together in a large mixing bowl. Stir in melted butter until combined. Reserve 3/4 Cup of the oat mixture for the topping.
  3. Sprinkle the remaining oat mixture into the prepared pan and press into an even layer, using your hands or the bottom of a measuring cup. Bake the crust until light golden brown, about 8-10 minutes. Cool on a wire rack for 1 hour.
  4. For the filling: Whisk the flour, sugar, instant espresso, and salt together in a medium bowl. Melt the the chocolate chips and butter for1-3 minutes on 50% power, stopping occasionally to stir the mixture. Transfer the chocolate mixture to a large bowl and let cool slightly. Whisk in the egg, until combined; then stir in the flour mixture until just incorporated.
  5. Adjust an oven rack to the middle position and heat to 325 degrees F. Spread the filling evenly over the cooled crust. Sprinkle the reserved oat topping. Bake the bars until a toothpick inserted into the center comes out with a few moist crumbs attached and the filling begins to pull away from the sides of the pan, 25-30 minutes, rotating the pan halfway through baking.
 
From The America's Test Kitchen Family Baking Book


Wednesday, March 26, 2014

Cheesy Grits

Grits are one of my food weaknesses, especially if they are cheesy grits. I love how creamy these grits are, but you must use the heavy cream to reach this consistently. I think these grits pair well with a side salad and either grilled chicken or fish. This is a simple grit recipe so play around with the different flavor combinations. For example, adding jalapenos or blending different kinds of cheeses together. Serves about 4-6 people.

Ingredients:
2 Cups chicken broth or stock
2 Tablespoons salted butter
1 Cup quick grits, such as Quaker
1 Tablespoon tomato paste
3/4 Cup heavy cream or heavy whipping cream
3 1/2 ounces sharp or extra-sharp cheddar cheese
  1. In a medium saucepan , bring chicken broth (or stock if using), and butter to a boil over medium-high heat. Slowly add in the grits, whisking often with a wire whisk for 5 minutes. After that turn the heat down to low and whisk in the tomato paste, heavy cream, and cheese until smooth and fully incorporated. Serve immediately.


Wednesday, March 19, 2014

Vanilla Cake

This cake is different from other cakes, because it doesn't have any butter! The fat comes from heavy cream. Kind of like the cream biscuit recipe. However, this cake require some time to make, but it is worth it. The texture of this cake is light, fluffy, and very moist. The flavor isn't too overwhelming, but is sweet and pleasant. Serves 14-18 people.
 Ingredients:
2 Cups granulated sugar
3 Cups cake flour (use for sure!)
1/2 teaspoon table salt
4 teaspoons baking powder
2 Cups heavy cream
2 teaspoons pure vanilla extract
  1.  Place a stand mixer bowl and the wire whisk attachment in the freezer. (I'm referring to a Kitchen Aid Stand mixer, or another brand similar.)
  2. Center a rack in an oven and preheat the oven to 350 degrees F.  Grease two 9-inch cake pans or three 8-inch cake pan with nonstick vegetable spray, and line the bottoms with nonstick parchment paper.
  3. In one small bowl, measure out your sugar. In a medium bowl, dry whisk your flour, salt, and baking powder together. In a third bowl, beat your eggs with a handheld mixer until thick.
  4. Remove the mixing bowl and whisk attachment from the freezer. Add the cream to the bowl and whip on medium-high, for about 2-3 minuets, or until it's as thick as Cool Whip. Slow the mixer down to medium and add the beaten eggs. Return to medium-high speed and whip until the mixture is slightly foamy.
  5. Slow the mixer down to medium and gradually add the sugar and then the vanilla extract. Stop the mixer. Remove your whisk attachment to the paddle attachment. Scrape down the bowl using a rubber spatula.
  6. With the mixer on medium speed, gradually add the flour mixture. Mix until combined. Stir the batter with the rubber spatula, and pour batter into prepared pans. Make things as even as possible.
  7. Bake the cakes 20-25 minutes, or until a toothpick inserted in the center comes out clean. Once cakes are down let them cool for 10 minutes in the pans on wire racks. After that, unmold the cakes and let them cool completely before frosting.

From All Cakes Considered by Melissa Gray

Wednesday, March 12, 2014

Parmesan Couscous

This couscous recipe is easy to make and it pairs well with most grilled fish or chicken. You get hints of the garlic and onion flavors and a nice buttery taste. The flavor isn't too strong, but if you want it a little stronger use more garlic, and maybe some more green onions too. Serves about 4-6 people
Ingredients:
1/3 Cup green onions (scallions), sliced
1 Tablespoon extra virgin olive oil
1 Cup Israeli (pearl) couscous, or regular couscous
1 or 2 garlic cloves, minced
1 1/4 Cups water
1 Tablespoon butter, unsalted
1-2 Tablespoons fresh parsley chopped. You can use dried too.
1/2 Cup Parmesan cheese, grated
black pepper, to taste
table salt, to taste
  1. Heat a medium saucepan over medium heat. Add the olive oil and warm the oil.
  2. Once oil is warmed, add the green onions and garlic. Saute for 2-3 minutes. Do not brown. Add the couscous to the green onion mixture, and stir continuously  for about 1-5 minuets to lightly toast. Then remove from heat and place the mixture in a small bowl. Set aside.
  3. Using the same saucepan, add the water and bring it to a boil over high heat. Once water is boiling add the couscous mixture to the pan. Stir to combine. Cover the pan and turn the heat down to low. Make sure it is simmering gently. Cook 8-10 minutes stirring occasionally. 
  4. When the couscous is done cooking add rest of the ingredients and serve immediately.

From the website Cooking Planit recipe by Emily Wilson

Thursday, March 6, 2014

Citrus Pudding

Orange is the perfect flavor for spring. This is a light and refreshing  pudding that is easy to make. The citrus flavor isn't too strong, but has a hint of vanilla that makes this pudding really tasty. I also like how this pudding has the perfect balance between sweet and sour. Every citrus lover will find this pudding wonderful. I'm sorry for posting so late, because this week has been busy for me. Serves about 4-6 people.
Ingredients:
1/2 Cup granulated sugar
3 Tablespoons cornstarch
1/4 teaspoon table salt
2 Cups fresh orange, or tangerine juice
1 medium orange or tangerine
3 Large eggs
3 Tablespoons  unsalted butter
2 teaspoons fresh lemon juice
1/4 teaspoon pure vanilla extract
  1. Whisk together the first 3 ingredients in a 3-qt heavy sauce pan. Whisk in orange juice until smooth. Remove 1 (2-inch) strip of peel from orange, using a vegetable peeler, and add to the pan. Bring to a boil over medium-low heat, stirring occasionally; boil, stirring constantly until mixture is thick and bubbly, about 5-10 minutes. Remove pan from heat.
  2. Whisk eggs until frothy. Gradually whisk 1/4 Cup of hot juice mixture into eggs; add egg mixture to the remaining hot juice mixture, whisking constantly. Return to heat, and cook, stirring constantly, 2 minutes or until thickened. Transfer mixture to a medium bowl; stir in butter and next 2 ingredients until butter is melted. Place heavy-duty plastic wrap directly onto warm pudding (prevents a film from forming); chill for 2 hours. When ready to serve discard peel, if desired.
From February 2014 edition Southern Living 


Wednesday, February 26, 2014

Monster Cookies

Monster Cookies should please almost everyone. They have a nutty flavor, mixed with the delicious chocolate. The texture of a Monster Cookie is incredibly soft and tender. I don't normally like oatmeal in cookies, but they add a great element to these cookies. Most kids will love you for making Monster Cookies.
Makes about 36 cookies.
Ingredients:
3 Large eggs
1 1/4 Cups packed light brown sugar
1 Cup granulated sugar
1/2 teaspoon table salt
1/2 teaspoon pure vanilla extract
1 12-ounce (about 1 1/2 cups in dry measuring cups) jar creamy peanut butter.
1 stick unsalted butter, softened
1/2 Cup multi-colored chocolate candies, such as M&Ms
1/2 Cup semisweet, milk, or dark chocolate chips
1/2 Cup raisins, optional
2 teaspoons baking soda
4 1/2 Cups quick-cooking oatmeal (not instant)

  1. Move an oven rack in the middle position. Line baking sheets with nonstick parchment paper, or nonstick baking mats. Preheat your oven to 350 degrees F.
  2. In a very large mixing bowl, beat the eggs and sugars on medium speed,  until combined. Add the salt, vanilla, peanut butter, and butter, beat until well combined. Stir in the chocolate candies, chocolate chips, raisins (if using), baking soda, and oatmeal. Stir well.
  3. Drop by tablespoons 2 inches apart onto the prepared baking sheets.
  4. Bake for 8-10 minutes. Do not over bake. Let stand on for about 5 minutes before transferring to wire racks to cool. 

Recipe from Donna Haney adapted by Paula Deen

Wednesday, February 19, 2014

Chocolate Sheet Cake

My Chocolate Sheet Cake is easy to make and delicious. Everyone in my family loves eating this cake. This cake is chocolaty, fairly sweet, but is perfectly balanced out with the buttermilk's slight tang. The texture is extremely tender and quite moist. I hope you'll give this recipe a try! Serves about 20-24 people.
Ingredients:
2 Cups all-purpose flour
2 Cups granulated sugar
1 teaspoon baking soda
1/4 teaspoon salt
1 Cup (2 sticks) unsalted butter
1/3 Cup unsweetened cocoa powder
1 Cup water
2 Large eggs
1/2 Cup buttermilk, low fat is fine.
1 1/2 teaspoons pure vanilla extract
For Icing:
1 stick of unsalted butter
6 Tablespoons of milk or buttermilk
3 Tablespoons cocoa powder
2 1/4 Cups confectioner's sugar, sifted
1/2 teaspoon vanilla
  1. Preheat your oven to 350 degrees F. Adjust an oven rack to the middle position. Grease a baking sheet with sides. Combine the flour, baking soda, and salt in a large bowl. 
  2. In a medium saucepan, combine butter, cocoa, and water. Cook on medium-high heat and bring to a boil, stirring occasionally. Remove from heat and slowly beat into the flour mixture. Increase the speed to medium and beat for 2 minutes until combined. Add the eggs, buttermilk, and vanilla and beat for 1 minute.
  3. Pour into the greased baking sheet and bake for 20-25 minutes, or until a toothpick inserted in the middle comes out clean.
  4. In a medium sauce pan (you can reuse the first saucepan if you want), combine the butter, milk, and cocoa. Bring to a boil. Remove from heat and whisk in the confectioner's sugar and vanilla. If it hardens give it a good whisk.
  5. Once cake is done, pour the icing onto the cake and smooth it out. Let cake cool 2 hours until serving. 


Wednesday, February 12, 2014

Blueberry Sauce

I found this blueberry sauce off of the blog Savory Sweet Life by Alice Currah. I love her blog so check it out. I did however tweak her original recipe to make it more to my liking. I think blueberries are one of the best fruits. This sauce is simple, but yummy. You can really taste the wonderful flavor that blueberries have in this sauce. Adding 1/4-1/2 teaspoon of cinnamon to the sauce makes it even better.  Makes about 1 1/4 cups sauce.
Alice's original recipe: http://savorysweetlife.com/2010/02/blueberry-sauce-recipe/

Ingredients:
2 cups frozen blueberries or fresh
3/4-1 cup granulated sugar. Depends on how sweet you like your sauce.
1/2 cup water
Optional: 2 teaspoons grated orange or lemon zest. Alice recommends
orange, but I like lemon
1 teaspoon cornstarch (if you want a slightly thick sauce, otherwise omit.)
pinch of table salt
  1. In a sauce pan or skillet put all the ingredients in and cook on medium-high heat. Cook and stir for 15-20 minutes until thickened. You can mash the blueberries with the spoon, leave them whole, or blend them for a smooth sauce. Serve warm.

Wednesday, February 5, 2014

Blondies

Blondies are a brownie's sister. I had never eaten a blondie before, until I made them for this blog. Looking at a blondie, you think you're eating a chocolate chip cookie bar with nuts. But they are not the same. Blondies have a lovely vanilla flavor with a rather strong pecan flavor. My favorite part is the white and semisweet chocolate complementing the blondies with their flavors. These are also soft and perfectly moist. Makes about 24 blondies.
Ingredients:
1 1/2 Cups (7 1/2 ounces) all-purpose flour
1 teaspoon baking powder
1/2 teaspoon table salt
12 Tablespoons (1 1/2 sticks) unsalted butter, melted and cooled
1 1/2 Cups packed (10 1/2 ounces) light brown sugar
2 Large eggs
4 teaspoons pure vanilla extract
1/2 Cup (3 ounces) semisweet chocolate chips
1/2 Cup (3 ounces) white chocolate chips, or semisweet chocolate chips
1 Cup (4 ounces) pecans, toasted and coarsely chopped
  1. Adjust an oven rack to the middle position and heat oven to 350 degrees F. Line a 13 by 9-inch baking pan with nonstick parchment paper. Whisk the flour, baking powder, and salt together in a medium bowl. 
  2. In a large bowl, whisk the butter and sugar together. Whisk in the eggs and vanilla until combined. Stir in the flour mixture until just incorporated. Stir in the chips and nuts.
  3. Scrape the batter into the prepared pan and smooth the top. Bake the blondies until a toothpick inserted into the center comes out with just a few moist crumbs attached, 22-25 minutes, rotating the pan halfway through.
  4. Let the blondies cool completely in the pan, set on a wire rack, about 2 hours. Remove the blondies from the pan using the parchment paper. Cut into squares.
From The America's Test Kitchen Family Baking Book

Wednesday, January 29, 2014

Basic Crêpes

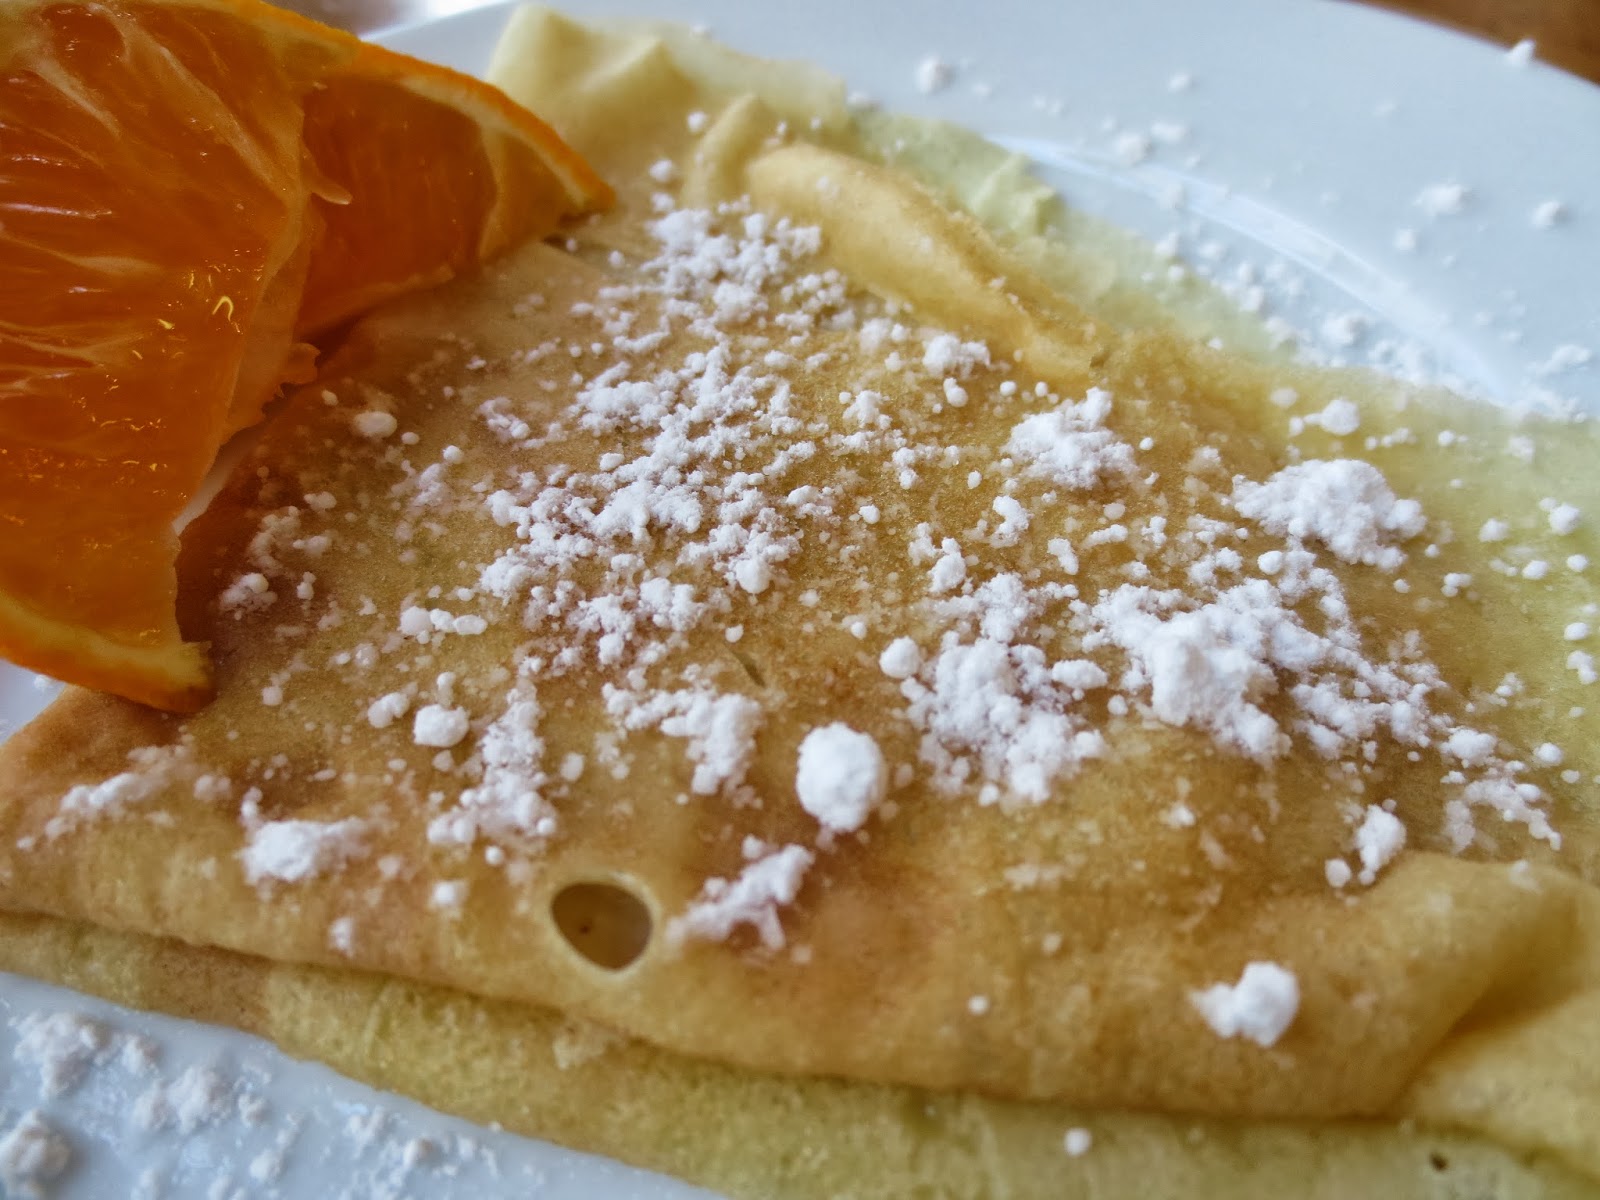
Crêpes are one of France's wonderful creations. They are similar to pancakes but very thin, and can be both savory or sweet. I usually prefer mine sweet. Crêpes have a mild flavor, but that is so you can fill them with other things. They have a tender and chewy texture. Have fun experimenting with your crêpe fillings! Makes  10-15 crêpes.
Ingredients:
1 1/2 Cups milk. I've used fat-free milk and didn't have any problems
1 Cup all-purpose flour. Buckwheat flour is commonly used for savory crêpes, but all-purpose is fine.
2 Large eggs
1 Tablespoon oil, such as vegetable or canola oil.
2 Tablespoons granulated sugar (if making sweet crepes.)
pinch of table salt
  1. Put all the ingredients into a blender or food processor. Blend until smooth. You can use a hand mixer but the batter won't be near as smooth. Refrigerate for 30 minutes or up to an hour.  
  2. Heat a 10-inch nonstick pan on medium-high heat. I learned that for me, the first crepe always turns out terrible, so only use 2 Tablespoons of the batter for the first crêpe.  Pour the 2 Tablespoons or batter into the pan and quickly shake your skillet back and forth until the batter covers most of the the skillet. 
  3. Let cook for a 1-2 minutes then carefully remove the crêpe using a rubber spatula and flip. Cook for 30 seconds, remove, then throw away or eat it.
  4. Repeat that process but use 3-4 Tablespoons of the batter since there is no need to dispose of the crêpes after the first one. Don't worry if your crêpes do not look beautiful in the beginning. It takes practice to make them look nice.
From Better Homes and Gardens New Cookbook