Tuesday, December 17, 2013

Vanilla Icebox Cutter Cookies

This is my favorite icebox cutter cookie recipe. These cookies may appear like they would be crunchy, but they are super tender. You get a hint of vanilla, a mellow buttery flavor, and a touch of sweetness. They are much better than store bought cookie dough. You can roll the cookie dough log in colored sugar, chopped toasted nuts, or sprinkles, to add more flavor and texture. You can refrigerate your dough for up to 3 days, or freeze for 1 month. Makes about 4 dozen cookies
Ingredients:
2 1/4 Cups (11 1/4 ounces) all-purpose flour
1/2 teaspoon  table salt
1 Cup (2 sticks) unsalted butter, softened
3/4 Cup (5 1/4 ounces) granulated sugar
 1/2 Cup (2 ounces) confectioner's sugar
2 large egg yolks. Save one or both of the egg whites, because my Pecan Rugelach recipe calls for 1 egg white.
2 teaspoons pure vanilla extract
  1. Whisk the flour and salt together in a medium sized bowl. In a large bowl, beat the butter and sugars on medium-high speed until light and fluffy, 3- 6 minutes. Beat in the egg yolks and vanilla until combined, about 30 seconds, scraping down the bowl and beaters as needed. Reduce the mixer speed to low and slowly add the flour mixture until combined, about 30 seconds.
  2. Transfer the dough to a clean counter space and divide into 2 equal pieces. Roll the dough into a 2-inch thick log and about 6-inches long. Roll in colored sugar or other stuff (optional), then wrap tightly in plastic wrap. Refrigerate until firm, about 2 hours.
  3. Adjust the oven racks to the upper-middle and lower-middle positions and heat the oven  to 325 degrees F. Line 2 baking sheets with nonstick parchment paper.
  4. Working with one log of dough at a time, slice the dough into 1/4-inch thick cookies. I find it easier to cut the log in half. Then cut each half into fourths, then cutting each of the fourths into thirds. A little complicated, but you'll get it. Place the cookies 3/4-inch apart from each other on your baking sheet. Bake the cookies until edges begin to brown, 12-15 minutes, switching and rotating the baking sheets halfway through baking. 
  5. Let the cookies cool on the baking sheets for 3 minuets, then transfer to a wire rack to cool completely before serving. 
From The America's Test Kitchen Family Baking Book

Pecan Rueglach

Rugelach is a scrumptious Jewish pastry. Rugelach can have many different fillings, but I love pecans. These cookies have a slight tang from the cream cheese, which is one of my favorite parts. The filling is nutty, sweet, sightly spicy, with a hint of vanilla. I'm sure you could omit the nuts and replace it with more sugar if you dislike nuts. These pastries are best eaten the same day. I will not post anything new until New Year's Day, which is a Wednesday. I'll still answer any questions though. Makes 24 pastries.
Ingredients:
2 sticks (1 Cup) unsalted butter, softened
8-ounce package of cream cheese, softened. You may use light, but not fat-free
2 Cups flour
1/2 Cup (packed) brown sugar, light or dark.
1/2 Cup pecans or walnuts
1/2-1 teaspoon ground cinnamon. I actuality doubled it, because I personally thought more was needed.
1/2 teaspoon pure vanilla extract
Egg wash. 1 egg white and 1 teaspoon water; whisk together. Set aside
Brown sugar or granulated white sugar
  1. Cream butter and cream cheese together, until smooth. Add the flour. Mix until the dough comes together in a ball. Divide dough in half. Wrap each half into discs about 1/2-inch thick. Refrigerate for 1 hour.
  2. While dough is chilling, put the brown sugar, pecans, cinnamon, and vanilla extract in a food processor. Process until the mixture is sandy.
  3. Preheat the oven to 350 degrees F. Grease baking sheets with nonstick vegetable spray. Sprinkle flour on a rolling pin. working with one chilled disc at a time, roll the dough into a circle 1/8-1/4-inch thick. Cut the circle into 12 wedges, as if you were cutting a pizza.
  4. Spread half of the nut mixture over the circle. Roll each wedge up, starting from the wide end. Place rugelach 1-inch apart on the baking sheet. Brush some egg wash on top of each cookie. Sprinkle the cookies with sugar. Do the same to the other disc.
  5. Bake cookies for 25-30 minutes, or until lightly browned. Once cookies are done baking, cool on the sheet for 2 minutes. Remove the cookies, and let cool competently on wire racks.

From The Year of The Cookie--Rose Dunnington

Wednesday, December 11, 2013

Russian Tea Cakes

I should have started posting cookie recipes earlier for the holidays but, here goes. To hopefully make up for my lateness, I'm posting 2 cookie recipes for this week and 2 for my next post. Also, I'm posting on December 17, (Tuesday) because I'm traveling and will not have access to my computer that day.
Russian Tea Cakes have several different names, but all are tasty. These cookies are very rich
and buttery tasting. The pecans add a good nutty flavor, while the confectioner's sugar brings in a sweet, delicate flavor. The cookie crumbles as you eat it and melts in your mouth. Makes about 30 cookies.
Ingredients:
1 Cup (2 sticks) unsalted butter, softened
1/2 Cup sifted confectioner's sugar, plus more
1 teaspoon pure vanilla extract
2 1/4 Cups all-purpose flour
1/4 teaspoon salt
3/4 Cup finely (but not chopped to a powder!) chopped pecans
  1.  In a medium sized bowl stir together the flour, salt, and nuts; set aside. Using an electric mixer, beat the butter, sugar, and vanilla until combined. Don't beat until light and fluffy. Beat the flour mixture on low into the butter mixture, until combined. Dough will be somewhat dry.Chill the dough in the refrigerator for 2-4 hours, or in the freeze for 30 to 45 minutes.
  2.  Adjust oven rack to middle position. Preheat oven to 400 degrees F.  Put some confectioner's sugar in a cereal bowl, and set aside. ( Later you may need more). Take pieces of chilled dough and roll them into 1" balls, using clean hands. Place on an ungreased cookie sheet. Bake until set but not brown, 10-12 minutes. 
  3. Once cookies are done let cool for about 5 minutes, remove 1 cookie at a time and roll it in the confectioner's sugar. Continue until all of the cookies are coated. Let them cool for an hour and roll them again in more powdered sugar. If you want, roll the cookies a third time in confectioner's sugar.

Double Chocolate Cookies

These cookies are so delicious. It is almost like your eating a brownie. I love how soft and chewy these cookies are. There is plenty of chocolate, so don't worry! You can also make the dough ahead of time and store it in the fridge for 1 day, or freeze it for up to a month. Makes about 48 cookies.
Ingredients:
2 sticks (1 Cup) unsalted butter, softened
1 1/2 Cups (packed) light brown sugar
2 eggs, room temperature
2 teaspoons pure vanilla extract
1 1/2 Cups all-purpose flour
1 1/2 Cups unsweetened cocoa powder
1 teaspoon baking soda
1/2 teaspoon salt
1 1/2 Cups semi-sweet or dark chocolate chips
  1. Preheat oven to 375 degrees F. Grease your cookie sheets with nonstick spray. Cream the butter and brown sugar. Add the eggs and vanilla extract. Beat until combined.
  2. Add flour, cocoa powder, baking soda, and salt to the wet mixture. Mix well.
  3. Add the chocolate chips. scrape the bottom of the bowl to make sure everything is evenly blended.
  4. Drop spoonfuls of dough 2-inches apart on greased pans. Bake 8-10 minutes. Once done cooking let cookies rest on the sheet for 2 minutes, then remove from pan. Cool completely on a wire rack and enjoy!
From The Year of the Cookie by Rose Dunnington


Wednesday, December 4, 2013

Alton Brown's Steamed Vegetarian dumplings

Dumplings are one of my favorite foods. I think this recipe is better than most take-out dumplings. The ginger seriously pops in this dish making it amazing. There are also hints of the sesame and cilantro that are a nice touch. You can  also make the filling a few hours ahead. I've read that you can infuse your dumplings with extra flavor while they steam, by placing either crushed garlic cloves or ginger in your pot of water. You will impress friends and family with these flavorful dumplings.  Serves about 6 people
Ingredients:
1/2 a package of firm or extra firm tofu. I prefer using extra firm.
1 rounded Cup shredded Napa cabbage. Regular green cabbage works too.
2 Tablespoons finely chopped red bell peppers
2 Tablespoons finely chopped scallions, or any kind of onion works
1 Tablespoon finely minced ginger. You can reduce it a little bit if you really don't like ginger.
1 Tablespoon finely chopped cilantro
1 Tablespoon hoison sauce
1 Tablespoon soy sauce
2 teaspoons sesame oil
1 egg, slightly beaten
1 teaspoon kosher salt, or 1/2 teaspoon salt
1/4-1/2 teaspoon freshly ground black pepper
1/4 teaspoon or a tad more cayenne pepper (optional)
Bowl of water, plus more for steaming
40-48 small wonton wrappers
  1. Preheat oven to 200 degrees F. Cut the tofu in half horizontally and lay between layers of paper towels. Place on a plate, top with another plate, and place a weight on top ( 14 oz can of vegetables works great.) Let stand 20 minutes. After 20 minutes, cut tofu into 1/4-inch cubes and place into a large mixing bowl. Add all the ingredients until the black pepper, or (if using) cayenne pepper. Lightly stir until combined.
  2. To form dumplings, remove 1 wonton wrapper from the package, covering the others with a damp cloth. Using either your finger or brush, wet the edges of the wrapper lightly with water. place 1/2 rounded teaspoon of the tofu mixture in the center of the wrapper. Shape as desired. Set on a sheet pan and cover with a damp cloth. Repeat process until all of the filling is gone.
  3. Using a steaming apparatus of your choice bring a third filled pot of water to a simmer over medium heat. Spray the steamer's surface with non-stick vegetable spray to prevent sticking. Place as many dumplings as will fit into steamer, without touching each other. Cover and Steam for 10-12 minutes over medium heat. Remove the dumplings from the steam to either a heatproof plate or glass dish sprayed with vegetable oil, and place in oven to keep warm. You may need to add more water as you continue cooking your dumplings. 
                                                   

Wednesday, November 27, 2013

Five Cup Salad

This is a really easy side dish to make for a party in a jiff. At my house we traditionally serve Five Cup Salad on Thanksgiving, because you can prepare this the night before. Five Cup Salad has a sweet and tangy flavor with tropical notes from the pineapple and coconut. Eating this makes me feel like I'm in Hawaii. I hope everyone has a wonderful Thanksgiving tomorrow!
Ingredients:
1 rounded Cup of sour cream, regular or light
1 Cup sweetened coconut
1 can (11-once)  mandarin oranges in light syrup, drained
1 can (20-once) pineapple tidbits in juice, drained
1 heaping Cup of mini marshmallows
  1. Put all the ingredients in a large bowl, and carefully stir everything until combined.

Wednesday, November 20, 2013

The Best Mac and Cheese

Homemade mac and cheese is really tasty, if you have the right recipe. This is a creamy, rich, and cheesy mac and cheese, that will knock your block off. Sharp cheddar cheese makes this mac and cheese wonderful. My favorite part is the smoked paprika, so don't omit! If you like the smoked paprika feel free to add a pinch more on the top of the mac and cheese before baking. Serves about 6  1/2 cup sizes.
Ingredients:
8 oz (1/2 lb or about 1 3/4 cups) macaroni or other medium sized tubular pasta
3 Tablespoons butter
1/4 Cup flour
1/2 teaspoon salt
 1/2 teaspoon dry mustard
1/4 teaspoon ground black pepper
1/8 teaspoon smoked paprika
2 1/2 Cups of either 2% milk, 1%, or whole milk.
3 Cups grated sharp cheddar cheese

  1. Boil the pasta according to the package directions. Drain and stir in either some butter or oil to avoid the pasta from sticking. Save that pot to make your sauce.
  2. Preheat oven to 375 degrees Faranheight. 
  3. Over medium heat, melt the butter. Add the flour, salt, dry mustard, pepper, and smoked paprika. Stir constantly over medium heat for three minutes. Stir in the milk. Keeping on medium heat, whisk constantly until thicken, about 10-15 minutes.
  4. Remove from heat and stir in 2 Cups of the cheese, until melted. Add the noodles to the sauce and stir, until covered. Add half the noddles to a 2 quart casserole dish, sprinkle half of the cheese, add the rest of the noddles, then sprinkle the rest of the cheese on top.
  5. Bake for about 25-30 minutes (30-40 if from refrigerator), or until it gets a light brown color on top.

Who could resist this?

Wednesday, November 13, 2013

Coconut Cake

I found this recipe off of Food Network's website. I did alter original recipe so that it would taste better. The cake was tender, somewhat on the heavy side, but still perfectly moist. I also find that toasting the sweetened coconut in the oven at 350 for a few minutes on a baking sheet enhances its flavor. The frosting is light and fluffy. It reminded me of marshmallow fluff and meringue. Serves 12-14
Ingredients:
2 Cups granulated sugar
1/2 Cup (1 stick) unsalted butter, at room temperature
1/2 Cup vegetable oil
5 eggs, separated
1 teaspoon coconut flavor, or if you don't want too much coconut replace with vanilla extract.
2 Cups all-purpose flour
1 teaspoon baking soda
1/4 teaspoon salt
1/2 Cup ground pecans (you can omit this if you want. I did and it turned out just fine.)
1 Cup buttermilk, or sour milk. You can use low-fat buttermilk.
1 Cup freshly grated coconut, or unsweetened shredded coconut
For frosting:
1 Cup granulated sugar
1/3 Cup water
1/4 teaspoon cream of tarter
2 egg whites. Save the yolks for my chocolate chip cookie recipe.
1 teaspoon of pure vanilla extract
Toppings: 1 1/2-2 Cups of sweetened coconut

  1. Preheat oven to 350 degrees Fahrenheit. Lightly grease and flour three 8-inch cake pans, or two 9-inch pans. Using an electric mixer, cream the butter and sugar. It will look somewhat like moist sand, so don't be alarmed if it doesn't appear normal. With the mixer running, add the oil and incorporate thoroughly.  Add the egg yolks, one at a time, beating well after each yolk. In a separate bowl, sift  the flour, salt, and baking soda together; stir in ground pecans if using.
  2. Alternately add the flour mixture and buttermilk to the egg mixture, ending with the flour. Beat until incorporated. Fold in the coconut. Using an electric mixer, beat the egg whites until stiff. Make sure your bowl is oil free. Wipe your bowl and beaters with some vinegar. Fold the egg whites into the batter. Pour batter into the prepared pans.
  3. Bake for about 20-30 minutes or until a toothpick inserted into the center of each cake comes out clean. Let the cakes cool for 10-12 minutes on a wire rake, then remove from pans. Let cool completely before frosting the cakes.
  4.  In a sauce pan combine sugar, water, and cream of tarter. Cook till bubbly and sugar dissolves. Make sure it is a hard boil. In a bowl combine eggs and vanilla extract. Add sugar mixture very slowly to egg whites, beating constantly with an electric mixer on high for seven minutes. If you add the sugar mixture too fast, it will take longer for your frosting to form. Then frost your cake and put the coconut on the top, in the middle of the layers, and sides of the cake.


Cake recipe from Emeril Lagasse
Frosting from The Better Homes and Garden Cookbook

Wednesday, November 6, 2013

Spinach Artichoke Dip


Spinach artichoke dip can be really good if it is made well. I haven't found a better recipe than this one. I love how creamy and garlicky this dip is. There is just a hint of spiciness from the cheese that adds a nice element. This is a savory dip that I love to make for parties. You can even make this dip a few hours ahead of time (without baking it) and refrigerate. Also using really spicy pepper jack cheese can easily overpower the garlic flavor, and also ruin it. (I've done this before.)  Serves 10-16 people, depending on how much people eat.

Ingredients:
1 package frozen chopped spinach, thawed and drained. To drain the spinach, take a small amount and squeeze out the liquid.
8 ounces ( 1 Cup) artichoke hearts, drained and chopped
8 ounces or one regular sized block of pepper jack cheese, such as Kraft's brand.
4 ounces Parmesan cheese, grated
1 Cup mayonnaise. Light is fine but never fat-free.
1 Cup sour cream
2 cloves garlic, minced
salt and pepper, to taste

  1. Preheat oven to 400 degrees Fahrenheit. Combine all the ingredients in a medium sized bowl, and stir well. Place mixture in a shallow glass casserole dish. (Ceramic works too.)
  2. Bake in the oven for 15-20 minutes (increase time 20-25 minutes if from refrigerator), or until it is bubbling and the top turns golden brown. Remove from oven and let cool for few minutes. Serve with crackers, crusty bread, and anything else you like.


Wednesday, October 30, 2013

Chocolate Chip Cookies

Chocolate chip cookies are one of the best cookies in the world. These cookies are soft and chewy. There is a slight caramel flavor from the brown sugar that I really like. Through experimenting, I learned that doing everything by hand works best for this recipe. Also, I prefer using dark chocolate chips, because it adds a nice depth to these cookies. Chocolate chip cookies are one of America's classics that you can't go wrong with. Makes about 24 cookies.

Ingredients:
2 Cups plus 2 Tablespoons (10 2/3 ounces) all-purpose flour. Make sure you don't spoon your flour into the measuring cup; use the dip and sweep method.
1/2 teaspoon baking soda
1/2 teaspoon table salt
12 Tablespoons (1 1/2 sticks) unsalted butter, melted and cooled
1 Cup packed light brown sugar
1/2 Cup granulated sugar
1 Large egg, room temperature
1  Large egg yolk, room temperature
2 teaspoons pure vanilla extract
1 1/2 Cups chocolate chips
  1. Adjust an oven rack to lower-middle position and heat the oven to 325 degrees Fahrenheit. Line 2 large cookie sheet with nonstick parchment paper. Whisk the flour, baking soda, and salt together in a medium sized bowl.
  2. In a large bowl, whisk together the melted butter and sugars together really fast until smooth, about 1-2 minutes. Whisk in the egg, egg yolk, and vanilla until combined, about 30 seconds, scraping down the bowl as needed.
  3. Add all the flour mixture into the egg mixture. Then stirs with a wooden spoon until combined, about 1-3 minutes. Mix in chocolate chips until incorporated.
  4. Drop about 2 tablespoons of dough on the cookie sheet. Bake until the edges are set and beginning to brown but the centers are still soft and puffy, 15-20 minutes, rotating the baking sheet halfway through.
  5. Let cookies cool on baking sheet for 10 minutes, then remove and enjoy!

These cookies need a cold glass of milk.
From The America's Test Kitchen Family Baking Book
I did alter the original recipe, so you are seeing my version.

Wednesday, October 23, 2013

Cream Biscuits

These biscuits are simple to make and taste good too. They have a fluffy texture, and they seem to melt in your mouth. They have a slightly sweet flavor from the heavy cream. The secret for all biscuit recipes is to not over mix or handle the dough. Otherwise, your biscuits will be tough and dense. You can even freeze these for up to one month. Just place the biscuits on a cookie sheet, freeze for a few hours, and then put them in a freezer safe zip lock bag. Everyone in my family adores these biscuits, and I hope yours will too!

Ingredients:
2 Cups (10 ounces) all-purpose flour
2 teaspoons baking powder
2 teaspoons granulated sugar
1/2 teaspoon table-salt
1 1/2 Cups heavy cream

  1. Adjust an oven rack to the upper-middle position and heat the oven to 450 degrees Fahrenheit. Line a baking sheet with nonstick parchment paper.
  2. Whisk together the flour, sugar, baking powder, and salt together in a large bowl. Stir in the cream with a wooden spoon until dough forms, about 30 seconds. Turn dough out on to a lightly floured surface and gather into a ball. Knead the dough briefly until smooth, about 30 seconds.
  3. Pat the dough into a 8-inch round, about 3/4 inch thick. Using a floured 2 1/2 inch biscuit cutter stamp out 8 biscuits, gently patting the dough scraps back into a uniform for 3/4-inch-thick piece as needed. Arrange the biscuits, upside down, on the prepared baking sheet.
  4. Bake biscuit until lightly browned, 15 to 17 minutes, rotating the pan halfway through. (increase time if from frozen to 20-25 minutes.) Let cool for a 5 minutes, then serve.
    I love a good homemade biscuit. Don't you?
From The America's Test Kitchen Family Baking Book

Wednesday, October 16, 2013

Triple Fudgy Brownies

These brownies are the best I've ever eaten. They are the densest, chocolaty-est, and richest homemade brownies you'll ever eat. It's almost like eating chocolate fudge to me. These brownies seem to slowly melt in your mouth. They have a velvety texture and are somewhat chewy. Every chocolate lover will go insane for these brownies. You do have to commit some into making these brownies, but you won't be disappointed. I did alter the original recipe to make it easier to follow. Serves about 12-16

Ingredients:
5 ounces semisweet or bittersweet chocolate, chopped.
2 ounces unsweetened chocolate
8 Tablespoons (1 stick) unsalted butter, cut into quarters
3 Tablespoons cocoa powder
3 Large eggs
1 1/4 cups sugar
2 teaspoons pure vanilla extract. Pure tastes better. I buy mine at Costco in a 16 once bottle for a little over $8.
1/2 teaspoon of table salt. Don't omit or your brownies will be too sweet.
1 Cup unbleached all-purpose flour
  1. Adjust an oven rack to the lower-middle position, and heat oven to 350. Spray an 8-inch square baking pan with nonstick cooking spray. Line your pan with either foil or nonstick parchment paper.(this makes clean-up easier). It's okay if the parchment paper doesn't fit super flat, just try your best.
  2. In a medium heavy-duty sized sauce pan melt the chocolates and butter on low heat together, stirring occasionally. Whisk in cocoa powder until smooth. Set aside to cool a little.  
  3. Whisk together the eggs, sugar, vanilla, and salt in a medium bowl, until combined, about 15-20 seconds. Whisk in warm chocolate mixture into egg mixture; then stir in the flour with a plastic or wooden spoon until just combined. Poor mixture into the prepared pan, and smooth out the top. Bake until slightly puffed, and a toothpick inserted in the center comes out with a small amount of sticky crumbs, clinging to it, 35-40 minutes.
  4. Allow the brownies to cool on a wire rack for about 2 hours before cutting. I think they are moister the day after. A sharp knife makes cutting these brownies easier for me.
    From the Baking Illustrated


Wednesday, October 9, 2013

Asian Style Nachos

One day I was thinking about how to make nachos more exciting, so I came up with this recipe. I think these nachos are tastier than the original. It is the peanut sauce that makes these nachos amazing. The peanut sauce has a flavorful combination of spices. The flavors of garlic and peanuts with a hint of lemon from the ginger is delicious. The texture has a perfect crunchiness, and the cheddar cheese is strange, but some how brings everything together. The cucumbers add a nice fresh element to these nachos that I really enjoy. I didn't think regular corn tortilla chips would work, so I used Rice Works sea salt and black sesame crisps. They are a cross between a rice cracker and sesame stick in a chip-like form. I hope you will give these nachos a try!
For peanut sauce:
1/2 Cup creamy peanut butter
1/4 Cup low-sodium chicken broth
3 Tablespoons low-sodium soy sauce
1 1/2 Tablespoons brown sugar
1 1/2 Tablespoons minced fresh ginger
2 Tablespoons lime juice
1 teaspoons minced garlic
1/2 teaspoon (or less) red chili flakes
1 shallot, peeled and roughly chopped. One green onion stalk works too.
Place all ingredients in blender and blend until smooth. Sauce can be made ahead of time, and will keep 3 to 4 days in the fridge. Yields about 1 1/4 cups.

Other ingredients:
Shredded sharp cheddar cheese. All of the quantities are up to you.
Green onions, sliced
Black beans
Shredded or sliced chicken
Cucumber cut into small pieces
Rice Works sea salt and black sesame crisps

Place as many chips on a microwave safe plate and sprinkle cheese on top. Microwave for 10-15 seconds on 50 percent power. If cheese isn't melted microwave for another 10-15 seconds on 50 percent power. After the cheese has melted, poor some sauce on then sprinkle the rest of the ingredients on top.
Peanut sauce from chef Ellie Krieger

Wednesday, October 2, 2013

Martha Stewart's Chocolate Bread Pudding

This is a really simple bread pudding recipe, and is easy to make. Bread pudding has a nice homey, southern feel to it that I adore. This recipe has a rich, creamy, not overly chocolate taste, that is irresistible. The texture is smooth to the tongue, and slightly chewy. I tried bread heels to replace the cinnamon bread, and it tasted just fine! (great way to get ride of those) My kitchen smelled so good as it was baking. This can be made 8 hours ahead of time, just cover and refrigerate. Also make sure your bread is dry, but still bendable, otherwise your bread pudding might be a little soggy. My family absolutely loves this bread pudding and I hope yours will too. I have a few variations after the photo to jazz up this dessert.  Serves about 6.
Ingredients:
1 Tablespoon of butter, plus more for baking dish.
8 slices (8 oz) of cinnamon raisin bread. If using heels, you'll need about 1 or 2 more slices. Depends on a brand's heel thickness.
2 Cups of whole milk (don't use fat-free, or it will have a weird texture). You may also use heavy cream for a richer bread pudding.
3 oz of semisweet chocolate chopped or you can use chips.
2 large eggs
1/2 cup granulated sugar
1/2 teaspoon vanilla
1 Tablespoon confectioner's sugar. (optional)
  1. Preheat oven to 350 degrees Fahrenheit. Lightly butter an 11-by-7-inch. (or 9-inch square baking dish; set aside.) Lightly toast bread in toaster or oven until lightly crisped.
  2. In a medium saucepan, combine milk, chocolate, and butter; place over medium-low heat, stirring occasionally, until chocolate has melted, about 5 or more minutes. Set aside.
  3. Tear bread into large pieces (about 4 of 5 per slice); scatter evenly in prepared baking dish. In a medium bowl, whisk together eggs, granulated sugar, vanilla. Whisk in warm milk mixture until combined. Pour over bread.
  4. For about 30 minutes to an hour, let the bread soak up the mixture, and gently push down the bread with the back of a wooden spoon. You really want the bread to soak up as much liquid as possible.
  5. Bake until pudding is puffed and is firm, about 25 minutes  (increase time if you refrigerated it; about 10 more minutes). Cool at least 10 minutes, and (if using) dust with confectioner's sugar before serving.


 Add a handful of chocolate-chips on top. Dark chocolate chips produce a more intense flavor.
Drizzle caramel syrup  on top after it has cooled.
A scoop of vanilla ice cream.


Source: Everday Food 

Wednesday, September 25, 2013

Orange Poppy Seed Bread

Orange is one of my favorite flavors. It tastes light and satisfying to me. You just can't get offended by its flavor. I'm a hard core chocolate lover, but I love this! This bread is sweet, slightly sticky, and  very moist. The poppy seeds add a nice element to the bread, but can easily be taken out if you don't like them.  A good cup of tea goes beautifully with this bread. It's a very easy recipe to make, and is a great gift too. Serves about 12-16.

Ingredients: 
Zest of one medium sized orange
1 Cup sugar
1/2 Cup buttermilk, or 1/2 cup milk+ 1 1/2 teaspoons of vinegar; mix together and let sit for 5 minutes, at room temp.
3 Tablespoons orange juice (reserve leftover juice for glaze)
3 Large eggs, at room temp
1 3/4 Cups all-purpose flour
1 1/2 teaspoons baking powder
1/4 teaspoon table salt
2/3 Cup of either vegetable, canola, or extra-virgin olive oil
1( or up to 3) Tablespoons of poppy seeds*
1/2 Cup of confectioners' sugar. Also goes by powdered or icing sugar.
Heat to 350 degrees Fahrenheit. Grease and flour an 8-in loaf pan
  1. In a bowl, combine orange zest and sugar, and rub together with your fingers, until it looks like wet sand. Whisk in buttermilk, 3 tablespoon orange juice and eggs. In a separate bowl, whisk together flour, baking powder, baking soda, and salt. Whisk dry ingredients into the batter, then whisk in oil and poppy seeds. 
  2. Pour batter into prepared pan. Bake until a toothpick  inserted in the center comes out clean, 40-55 minutes. Let cool in pan until warm to touch, then turn out onto a baking rack set over a baking sheet. Turn cake right side up.
  3. Whisk together the remaining orange juice and the confectioner's sugar. Poke holed on top of the bread bread, using a regular sized table fork. Use a pastry brush to spread glaze evenly over top and sides of cake. Cool completely before slicing. Lasts for about 5 days tightly wrapped up in plastic wrap or foil.
Adapted from the New York Times lemon poppy seed pound cake.
* Some people have a hard time digesting poppy seeds. If you have that problem, just let the seeds soak in the buttermilk as it comes to room temp. It's fine to add them into the batter with the buttermilk.

Wednesday, September 18, 2013

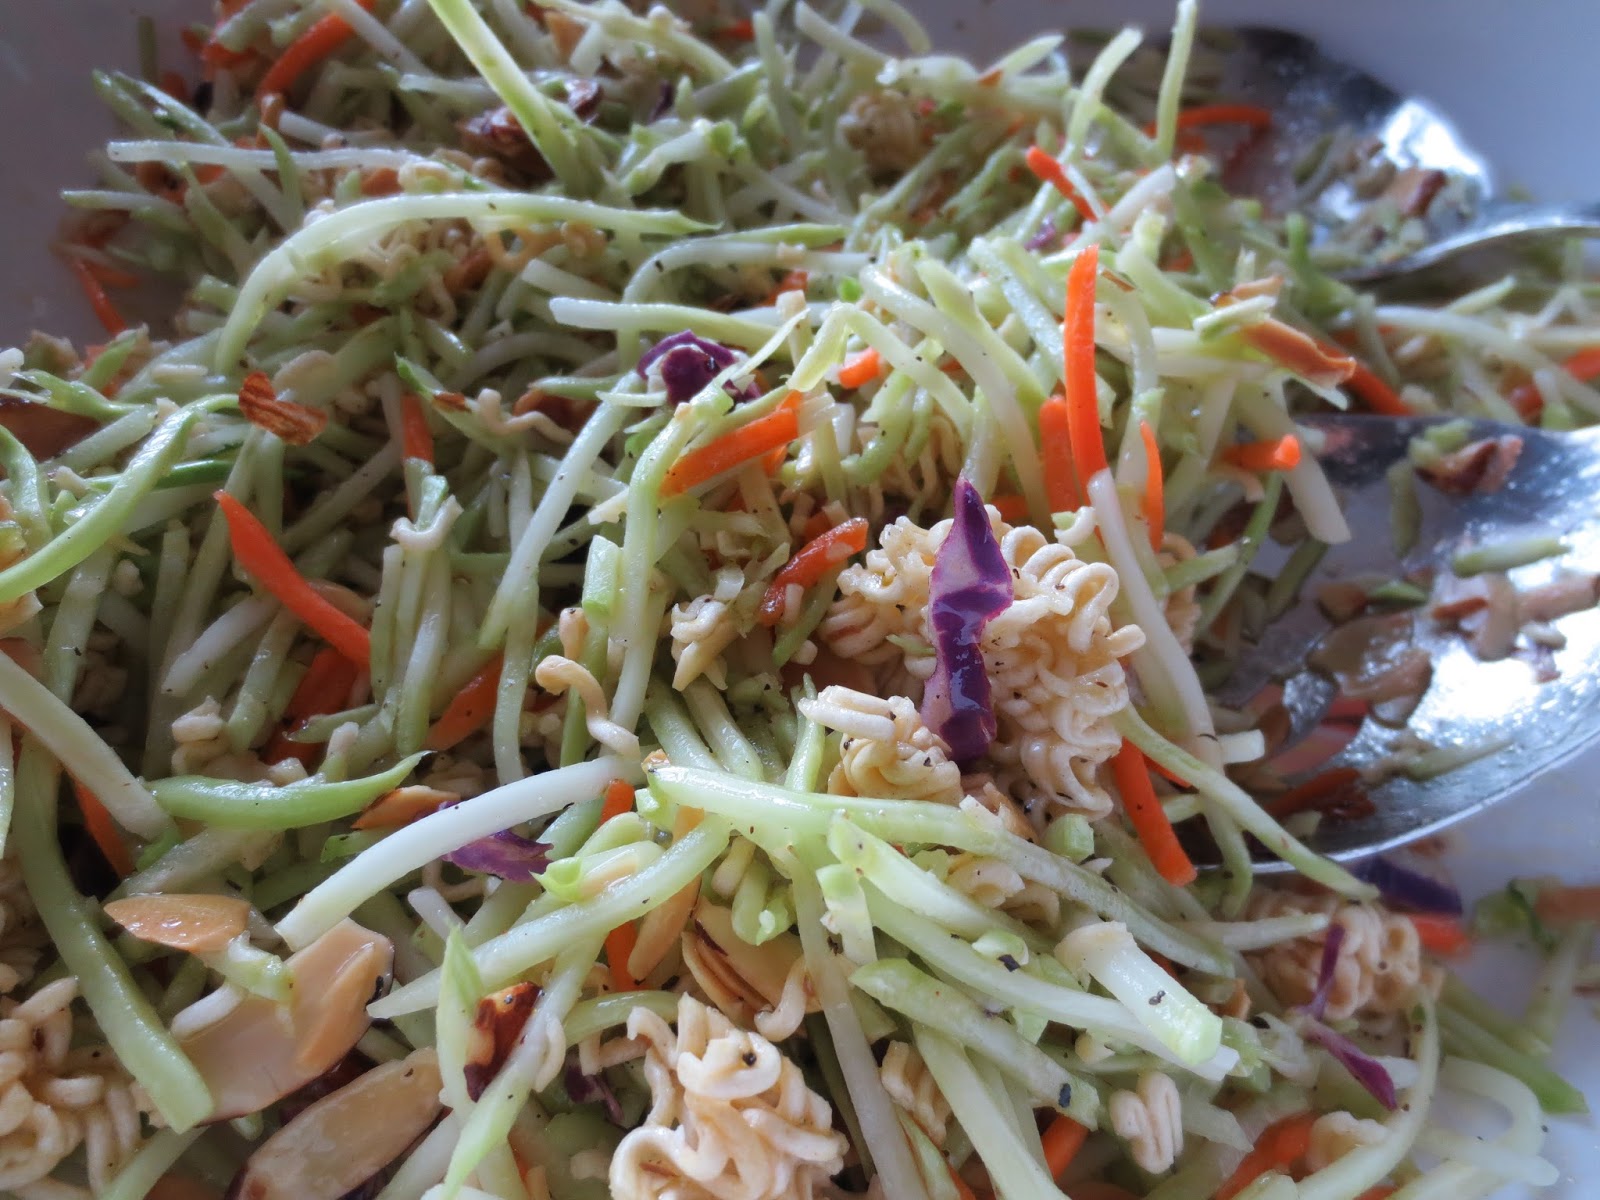
Broccoli Slaw


I got this recipe from a good friend, although I'm not sure where she found it. What I love about this recipe is how easy it is to make. The flavor is a perfect combo of sweet, sour, and slightly salty. I really like the ramen noodles crunchiness. It adds a nice texture that seems to balances the slaw out. Also you can make the dressing a few hours ahead of time, just put it in the fridge. This is an all time classic in my family. Any barbecued meat goes great with this. Enjoy! Serves about 6-8 people.
1 package of broccoli slaw. I've also used rainbow slaw and cole slaw, which works just fine.
For dressing whisk together:
1/2 tsp. of ground black pepper
1 tsp. of table salt
2 Tablespoons of vinegar
2 Tablespoons of granulated sugar
1/3 Cup of vegetable oil or canola
The flavor packet from chicken or oriental flavored ramen noddles, save the noddles

Crunchy toppings:
Preheat oven to 350 degrees fahrenheit
The noodles from  ramen noddle package, broken up
1/4-1/3 (depends on how much you like) Cups of salted sunflower seeds. Unsalted sunflower seeds is fine, I prefer salted.
1/2 Cups of sliced almonds. Put all the ingredients onto a cooking sheet, and bake for about 5-10 minutes, until you've reached a golden brown color.

Toss the slaw with the dressing. Add the crunchy toppings and toss again, before you serve it, otherwise they will get soggy.
Doesn't this look yummy?

Wednesday, September 11, 2013

Buttery Yellow Cake

I have never found a recipe that quite beats this one. I love the nice, sweet vanilla taste this cake has. It's not like how some cakes have an overpowering flavor, or not enough flavor. Smaller cake slices are better because this cake is on the richer side. The secret to making a perfect cake is having your butter softened and eggs and milk at room temp. You can use any kind of frosting. My favorite is chocolate. Serves about 10-12
You will need:
1/2 Cup whole milk, room temperate
4 large eggs, room temperature
1 3/4 cups of cake flour (definitely use if you are a beginner)
1 1/2 cups of granulated sugar
2 teaspoons of baking powder
3/4 teaspoons salt
16 tablespoons (2 sticks) unsalted butter cut into 16 pieces, softened

  1.  Adjust oven rack to the middle position and heat to 350 degrees. Grease and flour two 8- or 9- round cake pans, then line the bottoms with non stick parchment paper. (I never put parchment paper in my pans for this recipe, but beginner's please do.) Whisk the milk, eggs, and vanilla in a small bowl. (If you have a 2 cup liquid measuring cup just crack your eggs and vanilla in there).
  2. In a large bowl, whisk flour, sugar, baking powder, and salt together. Using an electric mixer on medium-low speed, beat the butter one piece at a time into flour mixture, until it resembles moist crumbs, 1 to 3 minutes.
  3. Beat in all but 1/2 cup of the milk mixture, then increase mixer speed to medium and batter until smooth, light and fluffy, 1 to 3 minutes. Reduce mixer to low and slowly add the remaining milk mixture, until batter looks slightly curdled, 15 seconds.
  4. Give the batter a final stir with a rubber spatula to make sure everything is combined. Scrape the batter into the prepared pans, smooth the tops, and gently tap the pans on the counter to settle the batter. Bake the cake until a toothpick inserted in the center comes out with a few crumbs attached, 20-25 minutes, rotating pans half way through.
  5. Let cakes cool in pans for 10 minutes. Run a small knife around the edge of the cakes, and flip the cakes onto a wire rack. Cool for 2 hours before frosting.   If you have any questions please comment, and I'll try to answer them. Thanks!
From The America's Test Kitchen Family Baking Book. Baking gurus wrote this!
I got a little crazy with my Duff Goldman cake graffiti cans!